This post may contain affiliate links. Read the full disclosure here.
There’s something absolutely magical about carving pumpkins with my three boys every October! While traditional jack-o’-lantern faces are fun, I discovered that creating an entire village of pumpkin houses takes our Halloween decorating to a whole new level.
The first time we lined up little glowing cottages and spooky mansions along our front walkway, the neighborhood kids went absolutely wild!
Pumpkin house carving has become our favorite family tradition, and honestly, it’s easier than you might think! Whether you’re creating a cozy cottage, a haunted mansion, or an entire neighborhood scene, these glowing little structures add such a whimsical touch to your Halloween decor. Plus, my boys love helping design different architectural styles and watching our pumpkin village come to life as the sun goes down!
Why Pumpkin Houses Beat Traditional Jack-o’-Lanterns Every Time
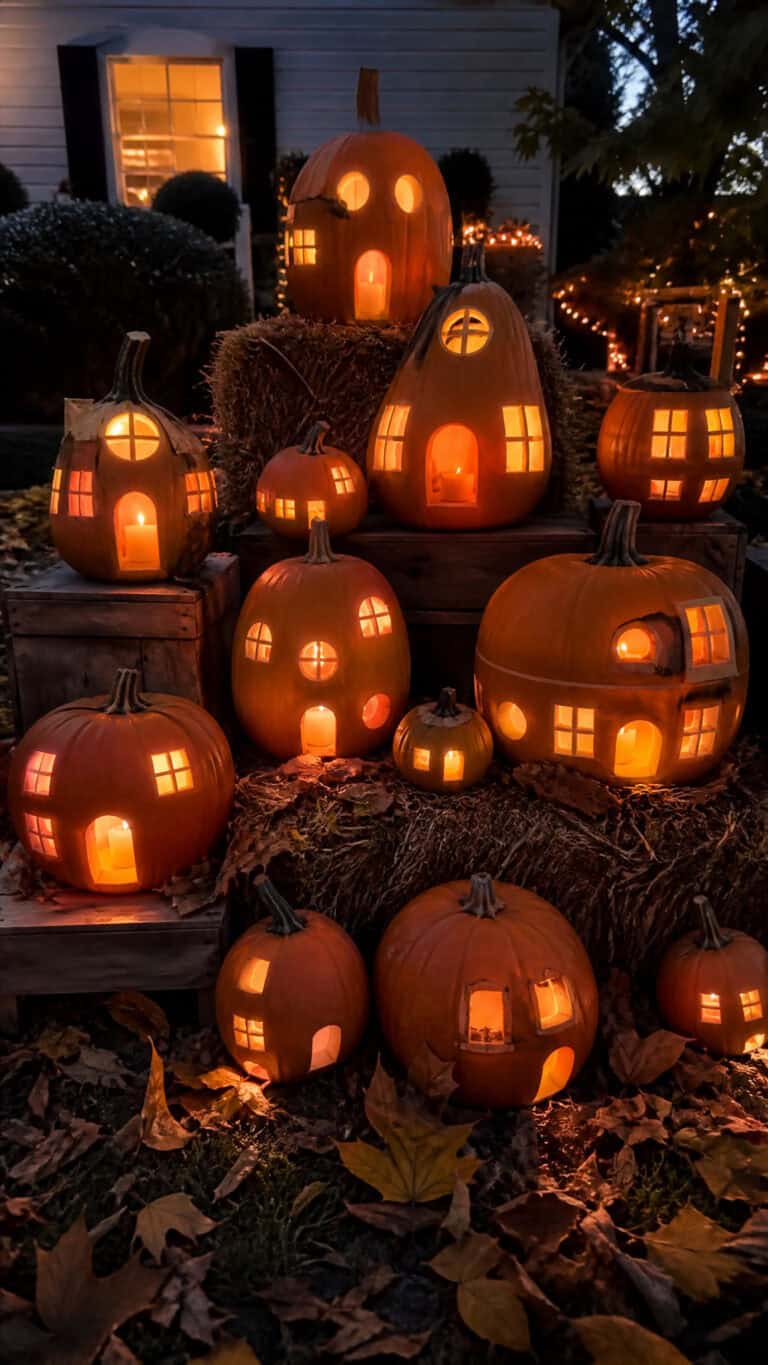
Let me tell you, after years of carving the same triangle eyes and toothy grins, discovering pumpkin house carving was like finding Halloween gold! Instead of just one spooky face, you get to create an entire architectural masterpiece that tells a story. My middle son calls it “making a pumpkin neighborhood,” and he’s absolutely right!
The beauty of carving houses into pumpkins is that they look amazing both day and night. During the day, the carved details create beautiful shadows and texture, while at night, the windows glow like a real home with the lights on inside. It’s seriously the coziest, most enchanting Halloween decoration!
Another huge bonus? These designs are actually more forgiving than traditional faces! If your window isn’t perfectly symmetrical or your door is a bit wonky, it just adds to the charm and character. My boys’ “imperfect” carvings often end up being the most adorable ones in our village!
Benefits of pumpkin house designs:
- Create an entire village scene instead of individual pumpkins
- More creative freedom with architectural details
- Mistakes look like charming character features
- Appeals to all ages, not just kids
- Can be as simple or detailed as you want
- Tells a story when grouped together
Cozy Cottage Pumpkin House Designs
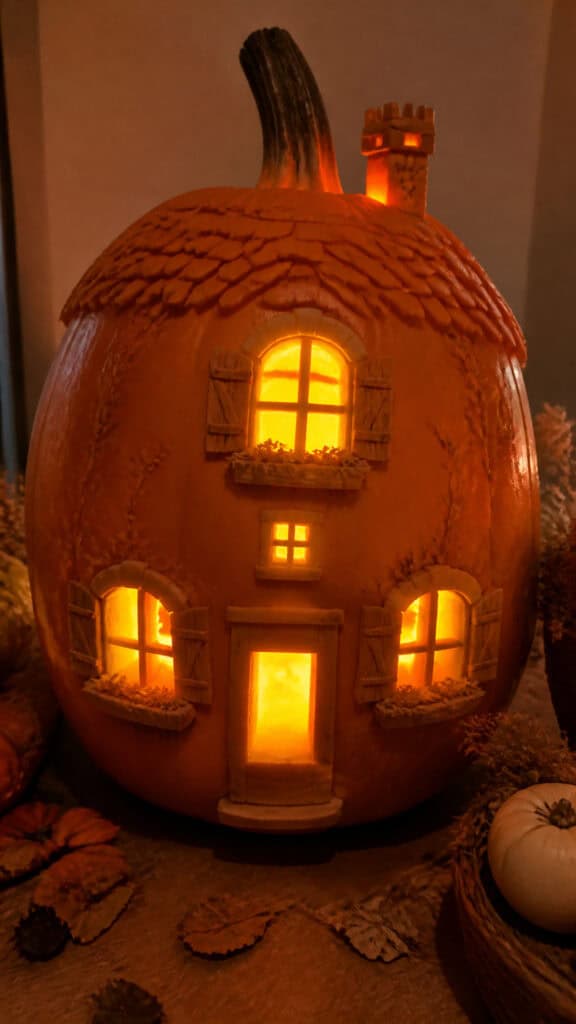
Starting with a simple cottage is perfect if you’re new to pumpkin house carving! I always begin our village with these because they’re straightforward and my youngest can actually help with the design process. A basic cottage just needs a door, a few windows, and maybe a chimney carved into the stem area!
For the cutest cottage effect, use medium-sized pumpkins that are nice and round. Carve a rectangular door in the center-bottom area, then add two or three windows above it. You can make the windows different sizes to add character – like an attic window that’s smaller than the main floor windows!
I love adding little details that make each cottage unique. Sometimes we carve shutters beside the windows (just thin vertical lines), or create a path leading to the door by scraping away the outer skin without cutting all the way through. The boys get so creative with adding flower boxes under windows or even a tiny carved pumpkin on the cottage porch!
Cottage carving tips:
- Start with a simple door and two windows
- Use different sized windows for visual interest
- Add shutters with thin vertical cuts beside windows
- Carve a chimney near the stem
- Create texture by scraping (not cutting through) for pathways or garden details
- Keep windows fairly large so plenty of light shines through
The best part about cottage designs is that you can make several and they’ll all look different! We usually carve three or four cottages in various sizes, and when they’re all lit up together, it looks like the sweetest little neighborhood street!
Spooky Mansion Pumpkin House Carving
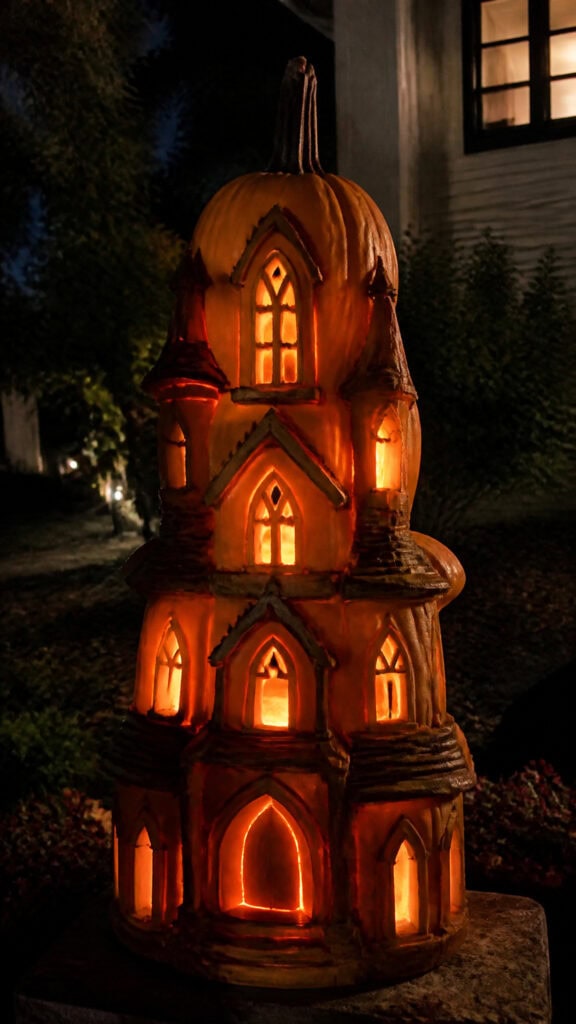
Now this is where things get really fun! My oldest son is obsessed with haunted mansions, so we always include at least one spooky manor house in our pumpkin village. These work best with taller, more elongated pumpkins that give you that vertical mansion vibe!
For a mansion, think bigger and more dramatic! Carve multiple stories by creating rows of windows stacked on top of each other. We usually do three or four windows on the bottom floor and two or three on the upper floor. A grand entrance door in the center-bottom makes it look extra fancy!
To make your mansion look properly spooky, try carving some windows with jagged edges or leaving some windows “dark” by not cutting all the way through. You can also add towers by using the natural shape of the pumpkin’s stem area, or carve Gothic-style pointed arch windows instead of rectangular ones!
Mansion design elements:
- Use tall pumpkins for better proportions
- Create multiple stories with stacked window rows
- Add a grand central entrance door
- Include towers or turrets using the stem area
- Carve pointed Gothic arch windows for spooky effect
- Add balconies by carving a small platform beneath upper windows
- Create broken or boarded windows for haunted house appeal
One trick I learned is to vary the window sizes throughout the mansion – some tall and narrow, some square, some arched. This makes it look like a real old house with additions built over time! And if you really want to go all out, carve some bare tree branches reaching across one side of the mansion for extra spookiness!
Charming Shop and Storefront Pumpkin Carvings
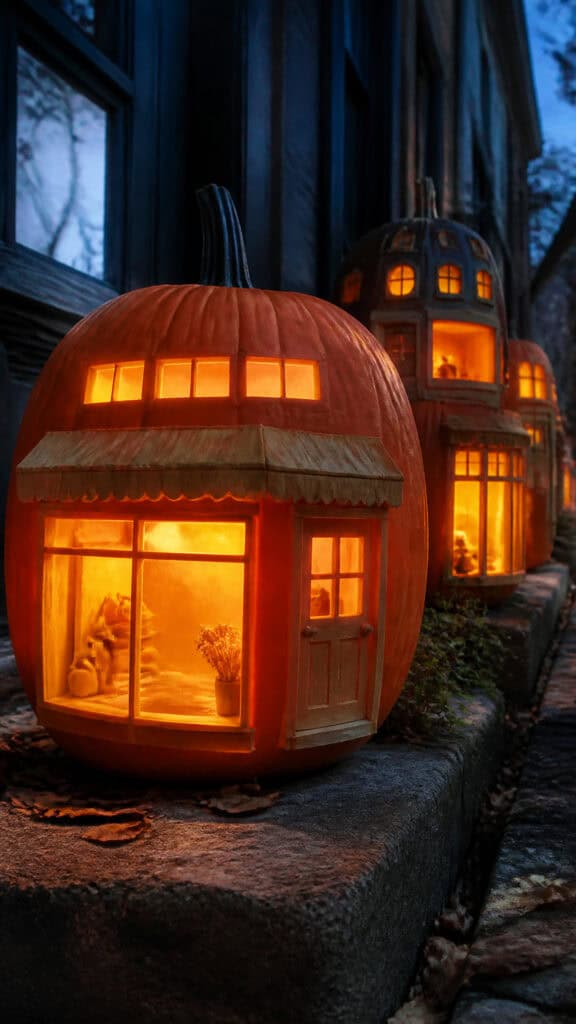
This idea came from my middle son who wanted to make a “pumpkin bakery,” and oh my goodness, it turned out adorable! Creating little shops and storefronts adds so much personality to your pumpkin village and gives you a chance to get really creative with the details!
For a shop, carve large display windows on the bottom portion – think big rectangular windows that show off the “goods” inside. You can even carve a door to the side rather than in the center, just like real storefronts! The key is making those windows nice and wide so the light really pours out!
We’ve made all sorts of shops over the years: a bakery, a bookshop, a potion store, and even a tiny pumpkin post office! The fun part is adding details that hint at what kind of shop it is. For a bakery, we carved a window with a scalloped awning above it. For the bookshop, we made tall, narrow windows. For the potion shop, we added some bubbles and swirls around the windows!
Storefront carving ideas:
- Create wide display windows at the bottom
- Position the door off to one side instead of center
- Add an awning by carving a curved line above windows
- Include a hanging sign near the top (carved or attached)
- Make window panes by leaving thin strips of pumpkin
- Add details that indicate the shop type
My boys love arranging our shop pumpkins to create a little Main Street scene! We line them up side by side, and it honestly looks like a tiny Halloween shopping district. It’s become such a hit in our neighborhood that other families have started asking for tips!
Church and Barn Pumpkin House Ideas
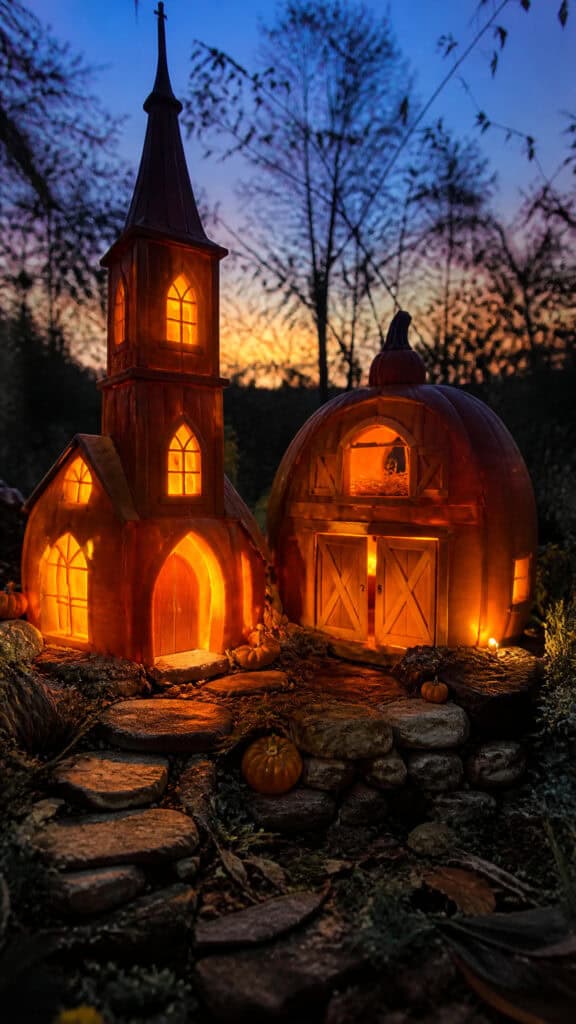
Adding a church or barn to your pumpkin village creates such a sweet, complete community feel! These are actually some of my favorite designs because they have such distinctive shapes that make them instantly recognizable, even from far away!
For a church, look for a pumpkin that’s a bit taller and tapered. The key feature is carving a large arched door at the bottom center and tall, pointed Gothic-style windows on either side. If you’re feeling ambitious, you can even carve a cross near the top or create a steeple effect around the stem area! We usually carve several small windows going up the sides to represent the nave!
Barns are equally fun and work great with wider, rounder pumpkins! Carve big double doors that swing open (or look like they do) at the bottom, and add a hayloft door near the top. We create the classic barn look by carving vertical lines to represent board-and-batten siding. Sometimes the boys add a weather vane carved near the stem!
Church carving features:
- Tall, pointed arch doorway in center
- Gothic-style pointed windows
- Small rose window near the top
- Cross detail above the door
- Steeple carved around stem area
- Multiple small windows along the sides
Barn carving features:
- Wide double doors at bottom center
- Large hayloft door near top
- Vertical lines for board siding texture
- X-pattern on doors
- Small windows on sides
- Weather vane detail at top
These special buildings really anchor your pumpkin village and give it that authentic small-town feel! Plus, they’re conversation starters – everyone who visits wants to know how we made them!
Creating Your Pumpkin Village Layout
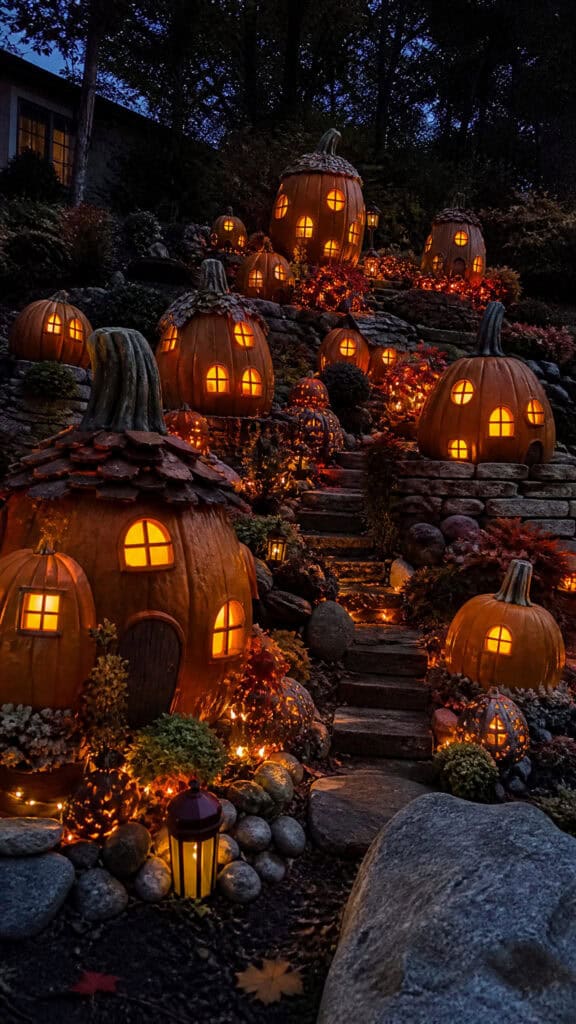
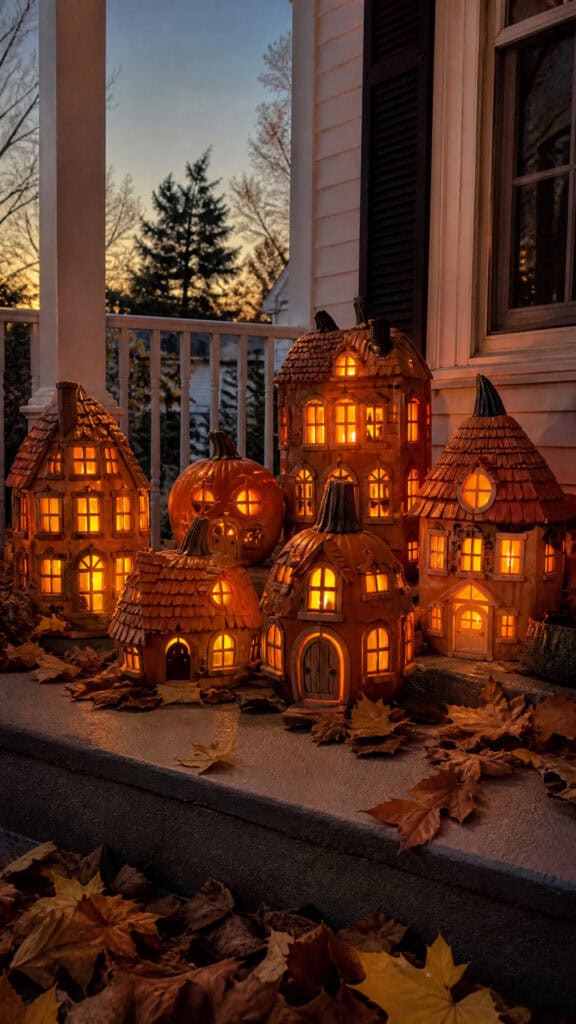
Once you’ve carved your pumpkin houses, the real magic happens when you arrange them into an actual village! This is honestly my favorite part because it’s when everything comes together and you can really see your Halloween neighborhood take shape!
I like to start by placing our largest buildings – usually the mansion and church – as anchor points. These go toward the back or sides of the display area. Then we fill in with cottages and shops, creating little streets and pathways between them. The boys help arrange them, and they’re surprisingly good at creating a layout that feels natural!
Varying the heights adds so much visual interest! We use overturned crates, books, or wooden blocks hidden under a black tablecloth to create different levels. This way, the houses in back are elevated and visible, while the ones in front sit lower. It creates depth and makes your village look so much more dimensional!
Village layout tips:
- Place largest buildings as focal points first
- Create pathways between house groupings
- Use risers or boxes to vary heights
- Position houses at slight angles for more natural look
- Leave space for additional decorations
- Consider the viewing angle from your street or walkway
- Group similar buildings together (shops in one area, cottages in another)
Don’t forget to add extra touches around your pumpkin houses! We scatter autumn leaves, add small LED tea lights along pathways, and sometimes include tiny figurines or toy cars. My boys love placing their little Halloween figures throughout the village like they’re residents visiting neighbors!
Lighting is crucial for the full effect! We put battery-operated LED candles inside each pumpkin house so they glow safely all evening. As the sun sets and those little windows start twinkling, it’s absolutely magical! Our whole neighborhood slows down to admire it, and that makes all the carving effort so worth it!
Easy Pumpkin House Carving Techniques and Tools
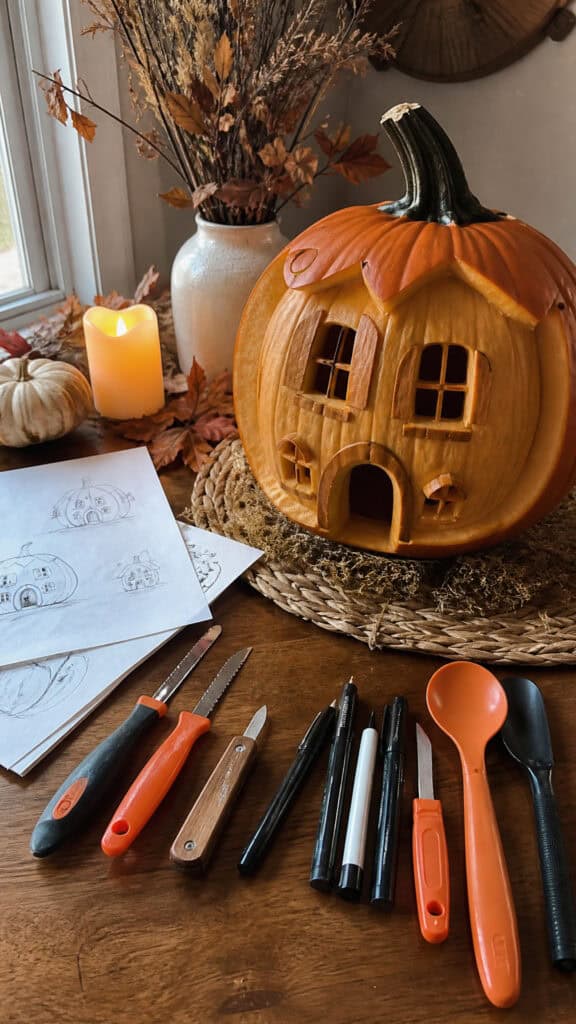
Let me share the carving techniques that have saved my sanity while working with three enthusiastic boys! Pumpkin house carving doesn’t require fancy tools – in fact, we use mostly basic supplies that you probably already have or can grab at any craft store!
First, always start by drawing your design on the pumpkin with a dry-erase marker or washable marker. This is a game-changer! You can erase and redraw until your house design looks just right. I have the boys sketch their ideas on paper first, then we transfer the design to the pumpkin. It prevents a lot of “oops” moments!
For cutting, I use a small serrated knife from a pumpkin carving kit for most of the work. The sawing motion is safer than pushing a large knife through, and it gives you more control around corners. For little details like window panes or shutters, a craft knife or even a linoleum cutter works beautifully! Just always supervise kids closely with any cutting tools – I do all the actual cutting while the boys design and scoop!
Essential tools for pumpkin house carving:
- Washable markers for drawing designs
- Small serrated knife or pumpkin saw
- Large spoon or ice cream scoop for cleaning out insides
- Craft knife for fine details
- Linoleum cutter for texture work
- Toothpicks for holding small pieces in place
- LED tea lights or battery candles for safe lighting
Here’s a technique that makes window carving so much easier: instead of trying to cut out perfect rectangles, cut the basic shape first, then go back and clean up the edges. You can also create window panes by leaving thin strips of pumpkin across the window opening – just carve around them!
For texture and details that don’t go all the way through, use a vegetable peeler or the linoleum cutter to scrape away just the outer skin. This is perfect for creating pathways, garden details, or siding texture on barns! The scraped areas let light through softly, creating a beautiful effect!
One mom-tip that’s saved me countless times: if you mess up a cut, you can often fix it! Use toothpicks to reattach pieces, or incorporate the mistake into your design. That accidental extra window? Now it’s a quirky architectural feature! That door that’s slightly crooked? It’s a charming old cottage door! Embrace the imperfections – they make your pumpkin houses unique!
Bringing Your Pumpkin Village to Life
Creating a pumpkin house carving village has become the highlight of our Halloween season, and I know it’ll become a treasured tradition in your family too! There’s something so special about working together to build an entire neighborhood from pumpkins, watching your kids’ creativity shine, and then seeing the whole display glow as evening falls. The joy on trick-or-treaters’ faces when they see your glowing village makes every minute of carving time worthwhile!
Start with just a few simple cottages this year if you’re new to pumpkin house carving, and I promise you’ll be hooked! Each year you can add more buildings, try new architectural styles, and expand your village. Before you know it, you’ll have neighbors asking how you created such a magical display, and you might just inspire a whole street of pumpkin villages! Now grab those pumpkins and let’s get carving – your Halloween village is waiting to come to life!