This post may contain affiliate links. Read the full disclosure here.
There’s something absolutely magical about stepping into your backyard on a chilly December evening and seeing your pergola or patio transformed into a twinkling winter wonderland!
As a mom of three energetic boys who love everything about Christmas, I’ve spent countless hours perfecting our outdoor lighting displays while the kids press their noses against the window in excitement.
Once the lights are draped overhead, explore these festive patio decorating ideas for more ways to complete your outdoor holiday setup!
Creating beautiful light swags for your outdoor spaces doesn’t have to be complicated or expensive, and the payoff is absolutely worth it! Whether you’re hosting holiday gatherings or just want to enjoy hot cocoa under the stars with your family, these draping ideas will help you create an enchanting atmosphere that makes every evening feel special.
Classic Catenary Draping for Timeless Elegance
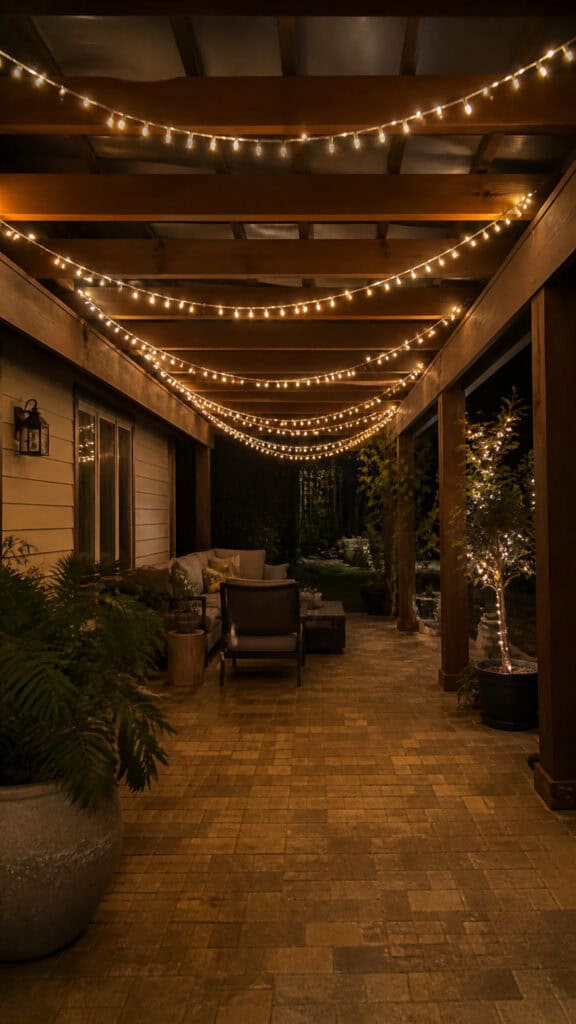

The catenary drape is hands-down my favorite way to hang Christmas lights because it creates those gorgeous, swooping curves that look professionally done! This technique involves hanging lights in a natural curve between two points, and it’s surprisingly easy once you get the hang of it.
To create this look, start by securing your lights at one corner of your pergola and let them hang naturally to the next support beam. The key is not pulling them too tight – you want that beautiful dip in the middle! I learned this the hard way when I stretched our first strand too taut and it looked more like a clothesline than festive décor.
For the best effect with catenary draping, use these tips:
- Space your anchor points about 6-8 feet apart for the perfect swoop depth
- Layer multiple strands at slightly different heights for added dimension
- Mix warm white lights with your colored strands for extra sparkle
- Use sturdy hooks or eye screws that can support the weight of multiple light strands
This draping style works beautifully with Christmas swags for outdoor lights because you can weave greenery garland along the same path as your lights! I love combining fresh pine garland with white string lights for a classic, elegant look that never goes out of style.
Zigzag Pattern for Playful Energy
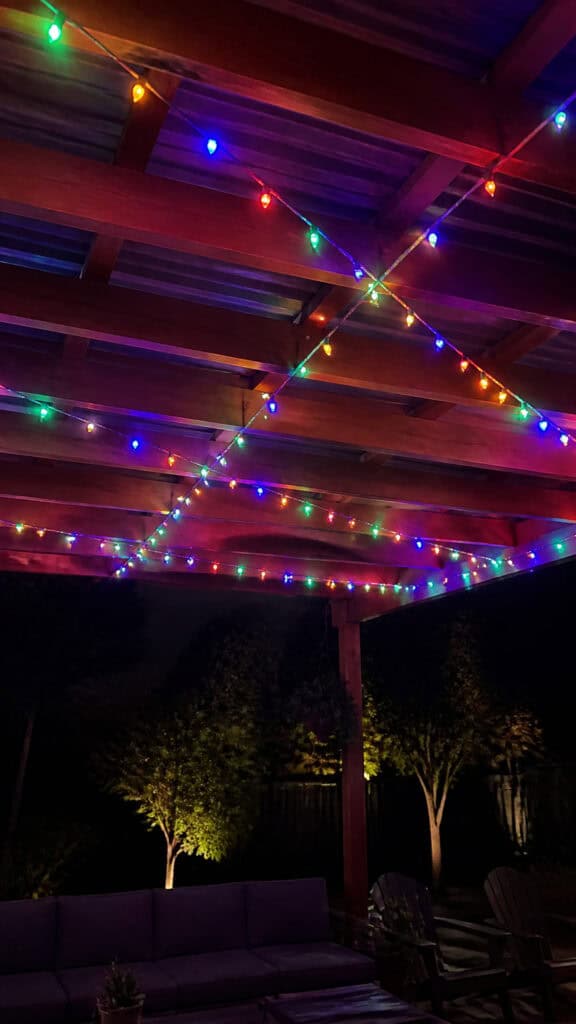
If you’ve got kids like mine who think more is more when it comes to Christmas decorations, the zigzag pattern is perfect! This dynamic draping style creates visual interest and fills your pergola space with tons of twinkling lights that the boys absolutely love.
Start at one corner of your pergola and work diagonally across to the opposite corner, then come back in the other direction to create your zigzag. I usually do at least three or four passes across our patio to really fill the space with light! The kids like to count how many points each zigzag makes, which keeps them entertained while I’m up on the ladder.
Here’s what makes the zigzag pattern so great for families:
- It covers maximum space with your light strands, giving you the most bang for your buck
- The crisscross pattern creates interesting shadow patterns on the ground below
- You can alternate colors for each zigzag line – we do red, then white, then green!
- It’s forgiving if your spacing isn’t perfect (trust me, with three boys running around, perfection isn’t happening)
When creating Christmas swags for outdoor lights using the zigzag method, consider adding ribbon or tulle between some of the strands! I’ve draped sheer white fabric along a few of the zigzag lines, and when the wind catches it, it looks like snow is gently falling through our pergola.
Waterfall Effect for Dramatic Impact
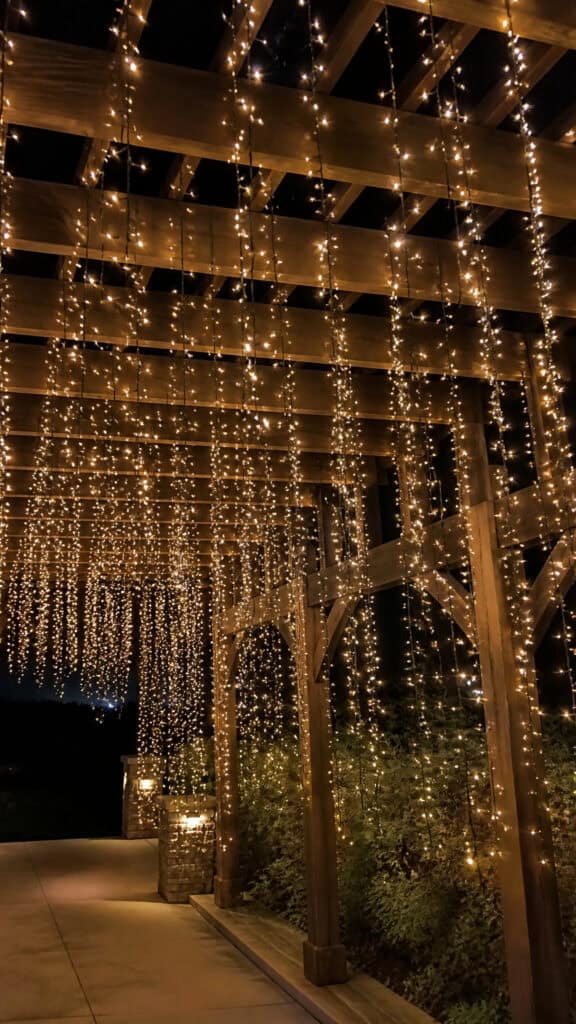
Oh my goodness, the waterfall effect is absolutely stunning and always gets compliments from our neighbors! This technique involves draping lights vertically from your pergola beams so they cascade down like a glowing waterfall, and it creates such a magical ambiance.
To achieve this look, attach your light strands to the top beams of your pergola and let them hang straight down, or slightly angled if you want a more natural waterfall appearance. I space mine about 12-18 inches apart across the entire pergola structure. The first time we did this, my middle son said it looked like we were sitting inside a Christmas present, and honestly, that’s exactly what it feels like!
The waterfall effect works especially well if you:
- Use icicle lights or curtain lights designed for vertical hanging
- Vary the lengths slightly for a more organic, natural waterfall look
- Combine with horizontal swags along the top for a complete framed effect
- Add some shorter strands near the edges and longer ones in the center for dimension
This style is perfect for incorporating Christmas swags for outdoor lights because you can hang garland swags horizontally across the top while the lights cascade down! We’ve wrapped our garland with additional light strands, and the combination of horizontal greenery with vertical lights is absolutely breathtaking.
Spiral Wrapped Posts for Candy Cane Charm
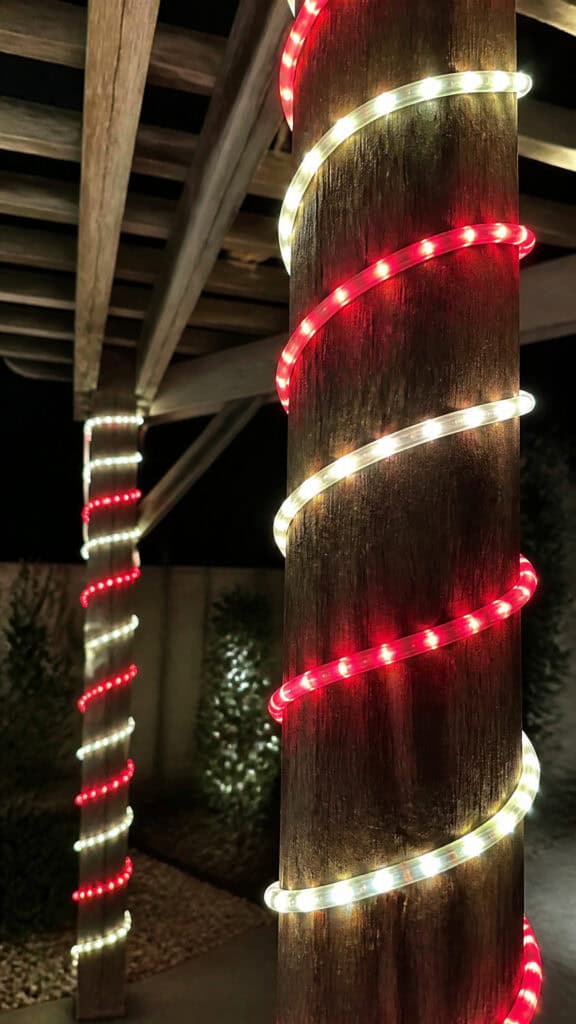
If your pergola has support posts, wrapping them in spiral lights is such a fun and festive touch! It reminds me of candy canes, and my boys love helping me count the rotations as we wrap (though they usually lose count around seven and just start making up numbers).
Start at the bottom of each post and work your way up in a spiral pattern, keeping your wraps evenly spaced for the best look. I use about 3-4 inches between each rotation, and I secure the lights with clear zip ties or outdoor-rated clips every few rotations to keep everything in place when the wind picks up.
Here are my tried-and-true tips for perfect spiral wrapping:
- Wrap in the same direction on all posts for visual consistency
- Use contrasting colors on adjacent posts – we alternate red and white!
- Pull the lights snug but not too tight, as they need a little give for temperature changes
- Start and end your spirals at the same height on each post for a polished look
The spiral wrapped posts create natural anchor points for your overhead Christmas swags for outdoor lights! Once your posts are wrapped, you can drape garland and additional light strands from post to post, creating a cohesive look that ties everything together beautifully.
Starburst Centerpiece for Focal Point Drama
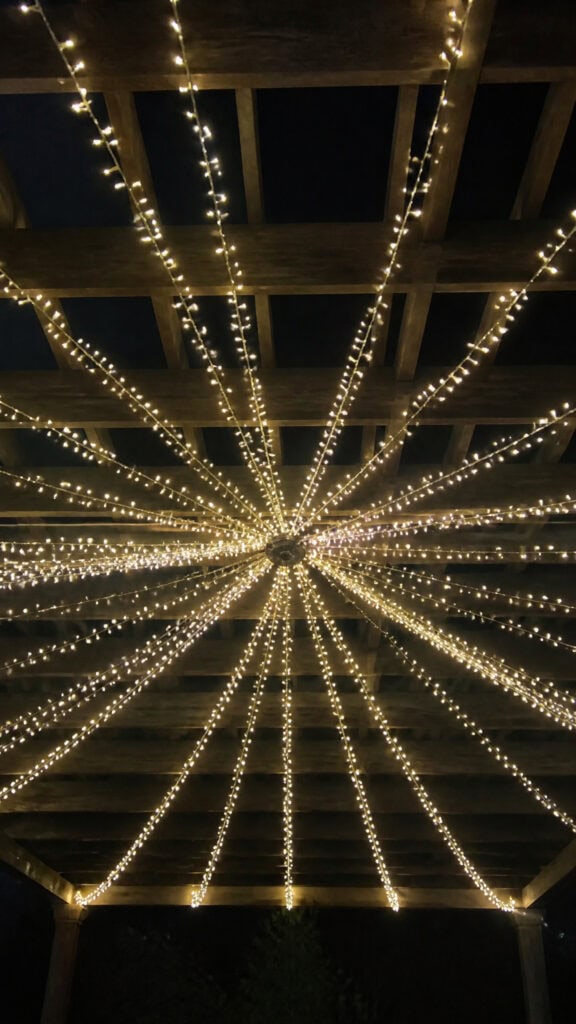
Creating a starburst focal point in the center of your pergola is like adding a crown jewel to your outdoor space! This technique involves gathering multiple light strands at a central point and radiating them outward to the edges, creating a spectacular starburst or sunburst effect.
I attach a sturdy hook or ring at the center point of our pergola ceiling, then connect 6-8 light strands to it before pulling each strand out to different points along the pergola’s perimeter. The effect is absolutely show-stopping, especially when you’re sitting underneath looking up! My youngest calls it our “Christmas star,” and honestly, that’s the perfect description.
To make your starburst centerpiece really shine:
- Use a heavy-duty swivel hook at the center to prevent twisting and tangling
- Space your radiating strands evenly around the perimeter for balance
- Consider using net lights or globe lights at the center for extra impact
- Combine with a wreath or decorative element at the central point
This design is fantastic for showcasing Christmas swags for outdoor lights because you can add greenery garland along each radiating line! The combination of lights and garland creates dimension and texture that looks incredibly professional, even though it’s totally DIY-friendly.
Layered Canopy for Cozy Ambiance
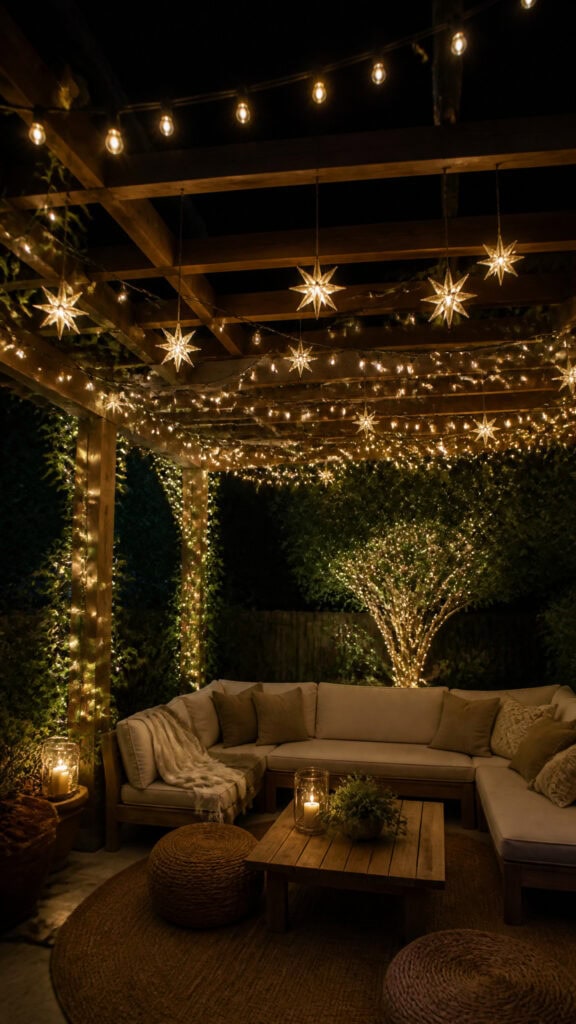
The layered canopy approach is my go-to when I want to create that intimate, cozy feeling that’s perfect for family gatherings! This technique involves hanging multiple layers of lights at different heights to create depth and a more enclosed, magical space.
Start with your highest layer running along the top beams of your pergola, then add a second layer about 12-18 inches below, and possibly a third layer below that if your pergola is tall enough. Each layer can follow the same pattern or different patterns – I like mixing catenary swags with straight lines for variety! The boys love sitting under our layered canopy because they say it feels like we’re in a special Christmas cave.
Make your layered canopy extra special by:
- Using different light colors or styles for each layer to create distinct zones
- Keeping the bottom layer high enough that tall guests won’t bump their heads (learned that one at our holiday party last year!)
- Adding the densest concentration of lights in the center layers where you’ll be sitting
- Incorporating string lights with different bulb sizes for added texture
When working with Christmas swags for outdoor lights in a layered design, drape your garland at the highest level and let your light layers cascade below! This creates a lush, full look that feels extravagant without being overwhelming, and it fills your entire pergola space with warm, inviting light.
Perimeter Frame with Draped Swags
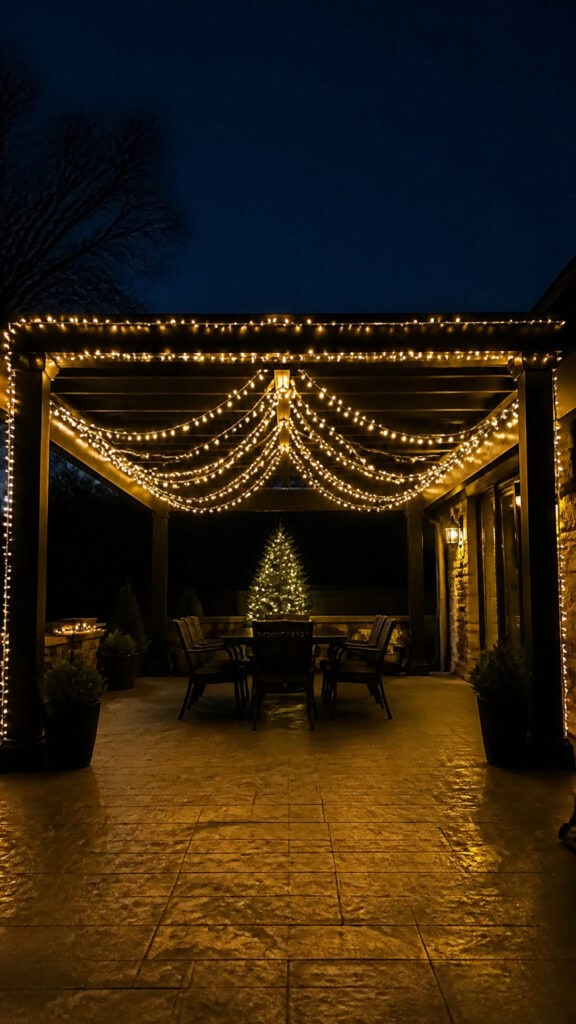
Framing your entire pergola or patio perimeter with lights and then adding interior swags creates such a polished, finished look! This is actually the first technique I mastered as a new outdoor decorator, and it remains one of my favorites because it’s straightforward but delivers major impact.
Start by outlining the entire perimeter of your pergola with a continuous strand of lights, making sure to secure them well at each corner and along the beams. Then, create swags that drape from the perimeter inward toward the center or across to the opposite side. I usually create 4-6 swags depending on the size of our space, and the symmetry is so satisfying!
Here’s how to perfect the perimeter frame technique:
- Use a different light style for the perimeter versus the swags – try mini lights on the frame and globe lights for swags
- Keep your swags evenly spaced for a balanced, intentional look
- Add extra lights at the corners where the perimeter meets to create bright focal points
- Test your layout before permanently securing everything (I use painter’s tape to mark my swag points first)
This framing method is ideal for Christmas swags for outdoor lights because the structure provides perfect anchor points for your garland! Wrap your perimeter frame with greenery, add pinecones or berries, and let your light swags peek through the foliage for a truly enchanting display that looks like it came straight from a holiday magazine.
Making Your Outdoor Space Merry and Bright
Transforming your pergola or patio with beautiful light swags is one of those projects that brings so much joy to your entire family! Every technique I’ve shared has been tested in our own backyard with three boys running around, so I know they’re doable even when life gets chaotic. The best part is watching your kids’ faces light up (pun intended!) when they see the finished display.
Remember, there’s no wrong way to decorate your outdoor space for Christmas – whether you choose one of these techniques or combine several, your creativity and effort will shine through! Start with what feels manageable, add Christmas swags for outdoor lights wherever they feel natural, and don’t stress about perfection. The memories you’ll make sitting under those twinkling lights with hot cocoa and your loved ones are what really matter. Happy decorating, and may your holidays be merry and bright!