This post may contain affiliate links. Read the full disclosure here.
October is hands-down my favorite month because it means I get to turn our entire yard into a Halloween wonderland! With three energetic boys running around, I’ve learned that decorating the halloween garden is just as important as the indoor decorations.
The kids spend so much time playing outside, and there’s something magical about transforming our flower beds, planters, and garden paths into spooky displays that make them squeal with delight every time they run past!
Creating a festive halloween garden doesn’t have to be complicated or expensive, and honestly, it’s become one of our favorite family traditions! Whether you’re working with flower beds, container gardens, or just want to add some spooky charm to your walkways, these eight ideas will help you create an outdoor space that’s equal parts enchanting and eerie. Trust me, your neighbors will be asking for your secrets!
Glowing Ghost Planters
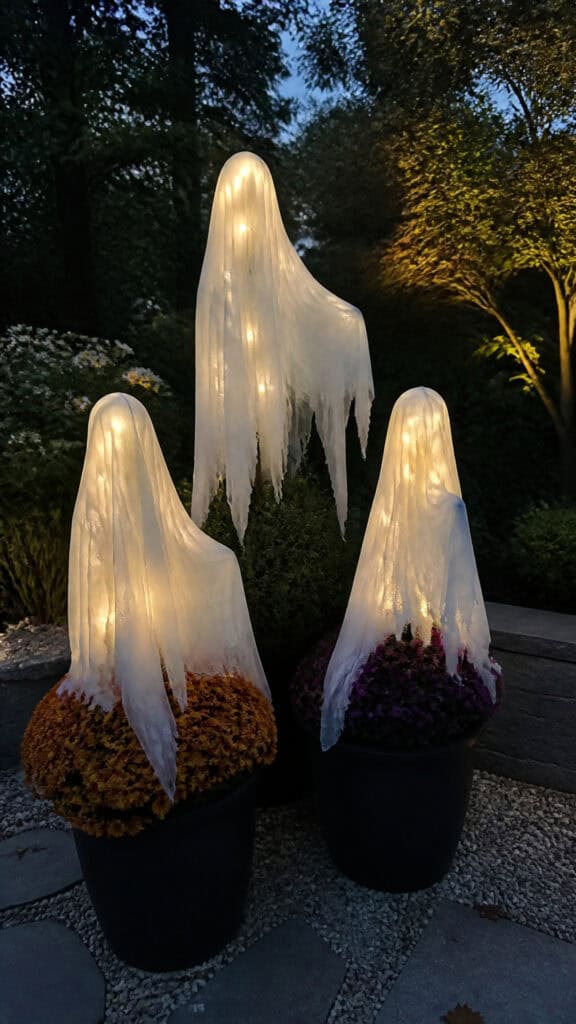
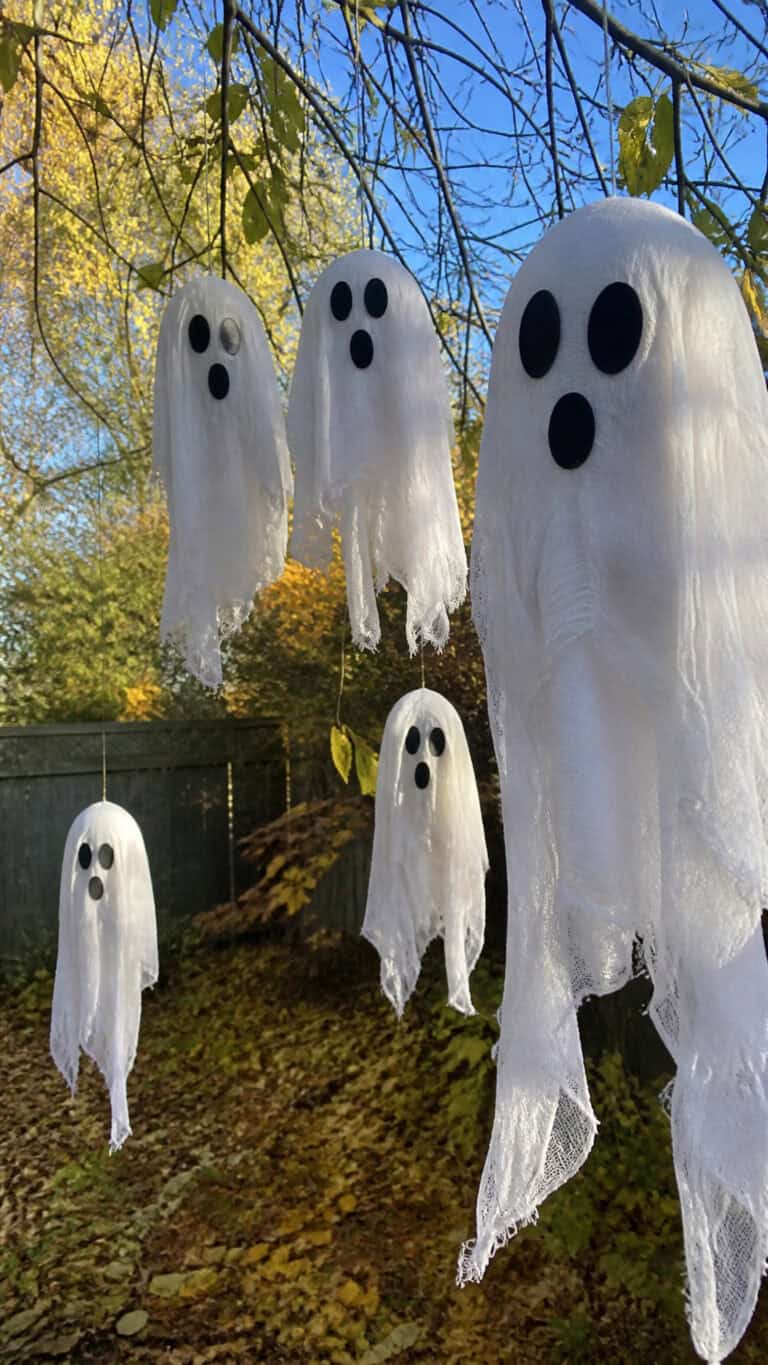
I absolutely love this idea because it’s so simple yet creates such an amazing effect at night! Glowing ghost planters are perfect for lining your porch, deck, or garden path. I use white fabric or cheesecloth draped over tomato cages or wire forms placed directly in large planters, then add battery-operated LED lights underneath. The boys think they’re actual ghosts floating in our garden!
To create these spooky sentinels, start with medium to large planters filled with fall mums, ornamental cabbage, or even just potting soil if you’re using them temporarily. Insert a tomato cage or create a simple frame from wire hangers, then drape white fabric over the top. Use black fabric paint or markers to add faces – I let each of my boys design one, which means we have happy ghosts, scary ghosts, and one that looks suspiciously like a superhero ghost!
The real magic happens at dusk when those LED lights start glowing from within. I use the flameless tea lights or small string lights tucked inside the base. Position these throughout your halloween garden for an ethereal effect that’s spooky without being too scary for younger trick-or-treaters. Plus, they’re completely weather-resistant if you use outdoor fabric, and they hold up beautifully through October’s unpredictable weather!
For extra impact, group them in odd numbers – three or five ghosts clustered together creates a more dramatic display than spacing them out evenly. I’ve placed some in our flower beds peeking out between the remaining summer perennials, and the effect is absolutely enchanting!
Pumpkin Pathway Borders
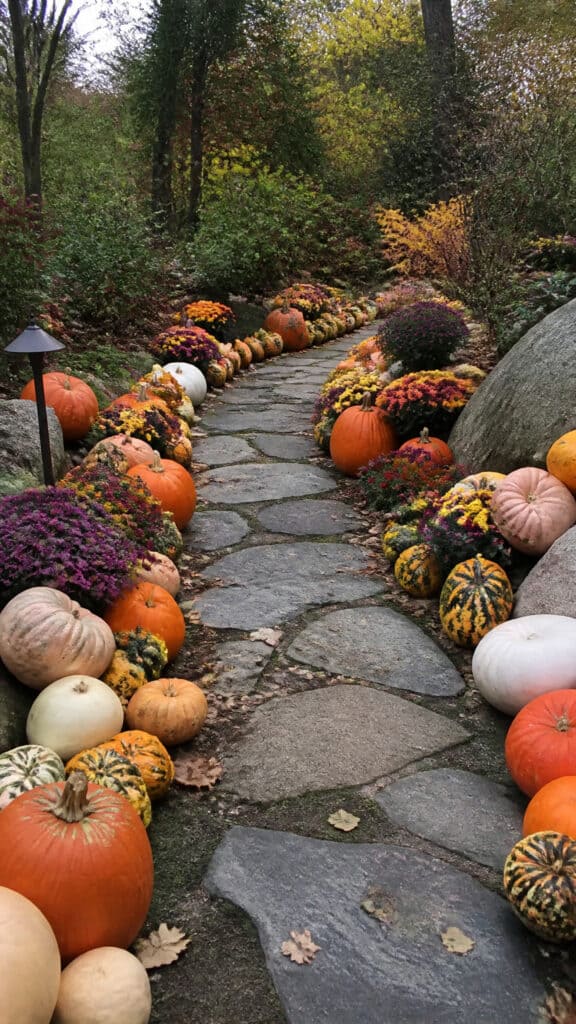
Nothing says Halloween quite like pumpkins, and using them to line your garden paths creates an instant festive atmosphere! I’ve found that mixing different sizes and varieties of pumpkins along walkways transforms even the most ordinary garden path into something special. My boys love helping me arrange them, and it’s become our official kickoff to Halloween season!
Start by selecting a variety of pumpkins in different sizes, shapes, and colors. I love mixing traditional orange pumpkins with white, green, and even blue varieties for visual interest. Place larger pumpkins at intervals along your path, then fill in between with smaller ones, gourds, and decorative squash. This creates a natural, abundant look that feels very harvest-festival meets haunted garden!
To make your pumpkin-lined path even more spectacular, consider carving or painting some of them. I usually carve a few with traditional jack-o’-lantern faces and paint others with fun designs – the boys especially love when we create monster faces or silly expressions. Battery-operated candles inside the carved pumpkins create a warm, welcoming glow that guides visitors along your path after dark.
Here’s a mom-tip that’s saved me countless times: hot glue! Use hot glue to attach smaller gourds and decorative elements to your larger pumpkins to create stacked displays that won’t topple over when the kids inevitably run past them at full speed. You can also nestle fall flowers like mums or asters between the pumpkins for added color and texture throughout your halloween garden design!
Creepy Crawly Flower Bed
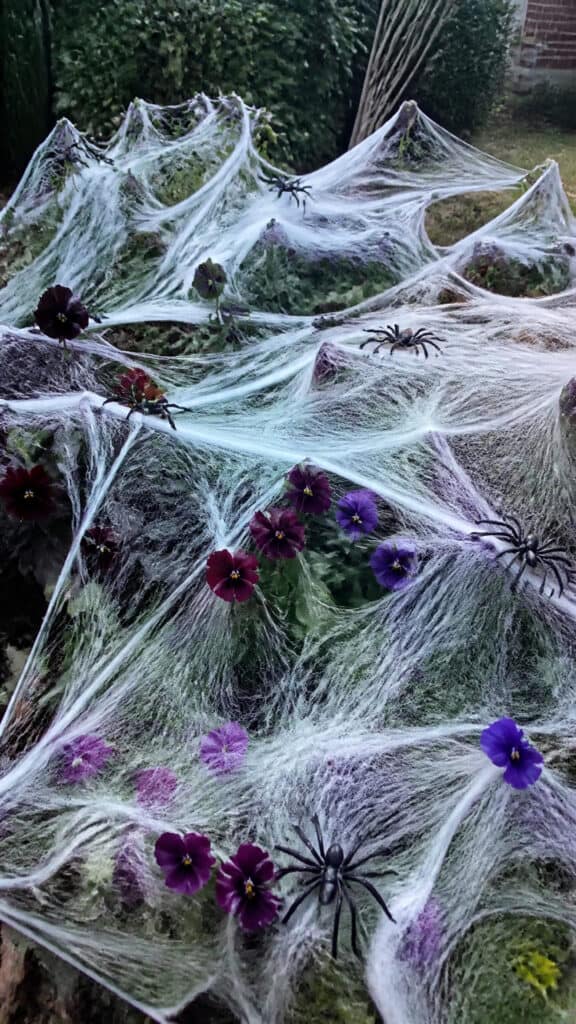
This one is always a huge hit with my boys and their friends! Creating a flower bed that looks like it’s been taken over by giant spiders and their webs is surprisingly easy and creates such a fun focal point in your halloween garden. The best part is that you can adapt this idea to work with whatever’s currently growing in your beds!
Start with stretchy spider web material – you can find this at any dollar store or craft store in October. Stretch it across your flower bed, draping it over existing plants and shrubs. The key is to not make it too perfect; real spider webs are messy and irregular! I anchor mine with small garden stakes or by tucking the edges under mulch. Then add oversized plastic spiders in various sizes throughout the webbing and climbing on plants.
To take this idea to the next level, I plant dark-colored flowers specifically for our Halloween display. Deep purple petunias, black pansies, and dark burgundy coleus create a moody backdrop that makes the white webbing really pop. If you’re planning ahead, these can be planted in late summer for perfect October color!
For an extra creepy touch, add some spider egg sacs made from white balloons covered in webbing material, or use cotton batting pulled apart and attached to branches. My middle son insists we need at least one “really giant” spider each year, so we’ve invested in a few large decorative spiders that return season after season. Position them like they’re crawling out from behind plants or descending from trees on fishing line for maximum spook factor!
Witch’s Potion Garden
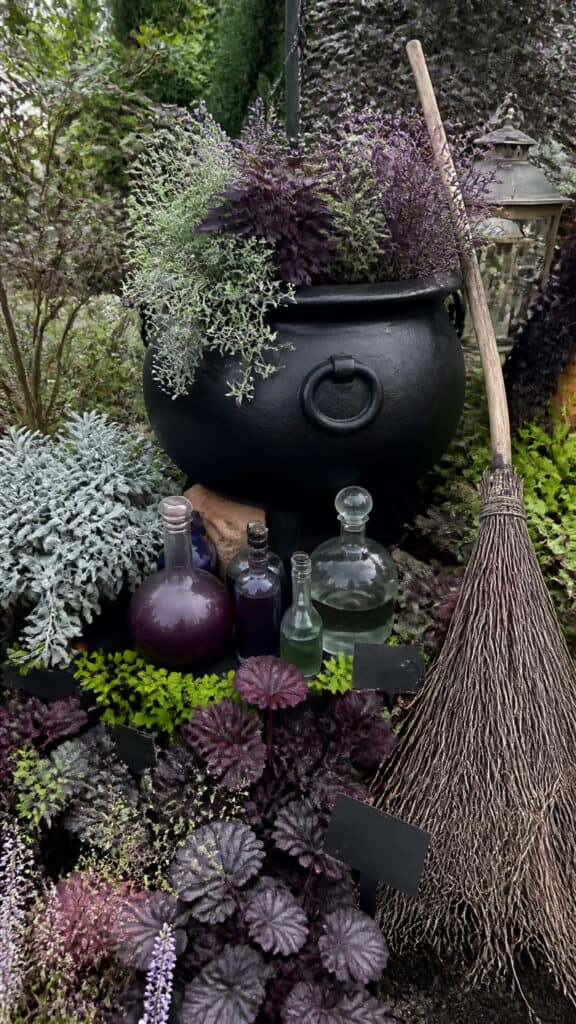
Creating a witch’s potion garden has been one of my favorite projects because it’s both decorative and educational! I use this as an opportunity to teach the boys about different herbs and plants while making our halloween garden look absolutely magical. Plus, many of the herbs we plant for this display can actually be used in cooking later!
Choose a dedicated flower bed or large container for your potion garden. I use plants with interesting names and appearances that could believably be potion ingredients: lamb’s ear (so soft and fuzzy!), purple basil, black mondo grass, dusty miller, and various herbs like sage, rosemary, and thyme. Add small decorative signs with spooky names – we’ve labeled ours with things like “Dragon’s Breath,” “Witch’s Whiskers,” and “Moonlight Moss.”
The real fun comes in the staging! I place an old black cauldron (a large black planter works perfectly) as the centerpiece, filled with dry ice for a smoking effect during parties, or with purple and orange trailing plants for everyday display. Surround it with potion bottles – I save interesting glass bottles throughout the year and fill them with colored water, food coloring, and glitter for a magical effect.
Add witch-themed accessories like a broomstick propped nearby, a pointed hat hanging on a garden stake, or spell books (wrapped in plastic to protect them from weather) placed on a small outdoor shelf. My boys love helping me create potion labels for the bottles, and we’ve made it a tradition to come up with increasingly silly potion names each year. This corner of our halloween garden always becomes a photo opportunity for visitors!
Skeleton Garden Party
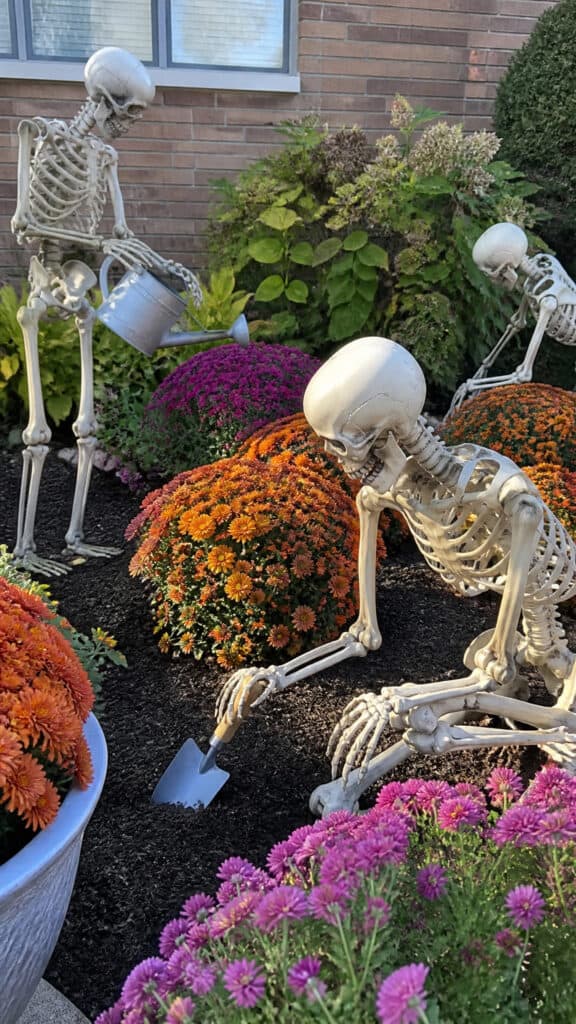
Okay, this one makes me laugh every single time I look at it, and it’s become absolutely iconic in our neighborhood! Setting up skeletons doing various gardening activities throughout your flower beds creates such a fun, whimsical scene. The boys think it’s hilarious, and honestly, so do I!
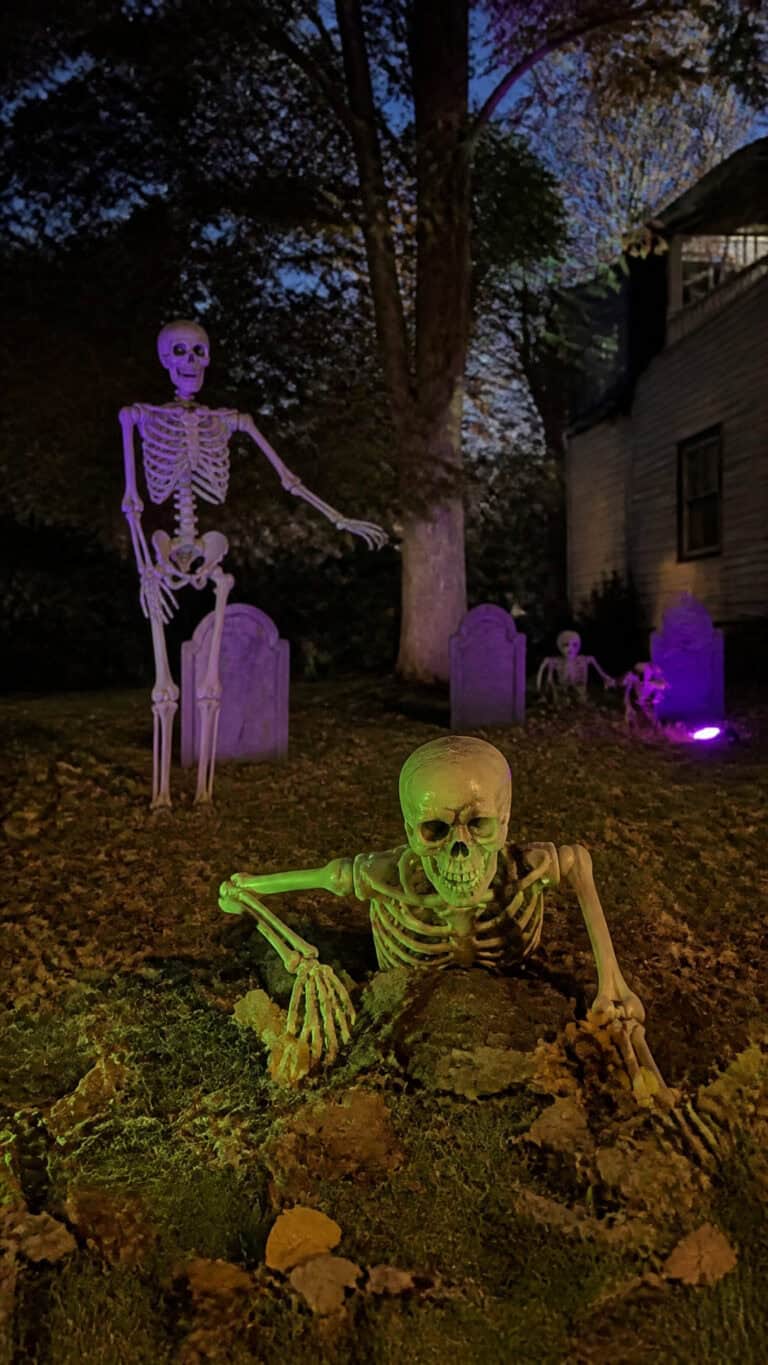
You’ll need a few poseable skeletons – I’ve collected ours over several years, watching for post-Halloween sales. Position them throughout your halloween garden as if they’re tending to the plants. One skeleton can be “planting” bulbs with a small trowel, another “watering” with an old watering can, and another “raking” leaves. The key is to really pose them naturally, bending their joints so they look like they’re actually engaged in the activity!
I add props to make the scene more realistic and funny: a skeleton wearing a sun hat and gardening gloves, one with reading glasses examining a plant, or one taking a break with a drink. You can even create a skeleton that’s been “working” so long they’re partially buried in the flower bed with just their upper half showing! The possibilities are endless, and my kids come up with new scenarios every year.
To keep your skeleton crew stable through wind and weather, I use garden stakes zip-tied to their backs and pushed deep into the soil. This has saved me from finding skeleton parts scattered across the yard after storms! You can also add seasonal flowers around them in complementary colors – orange marigolds, deep purple pansies, or white alyssum create a beautiful contrast against the white bones!
Haunted Fairy Garden
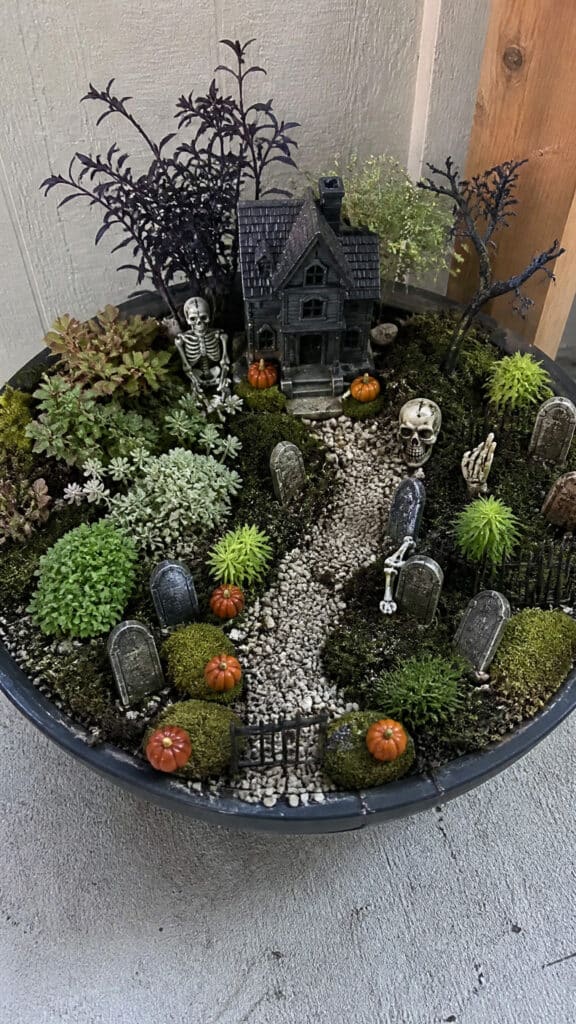
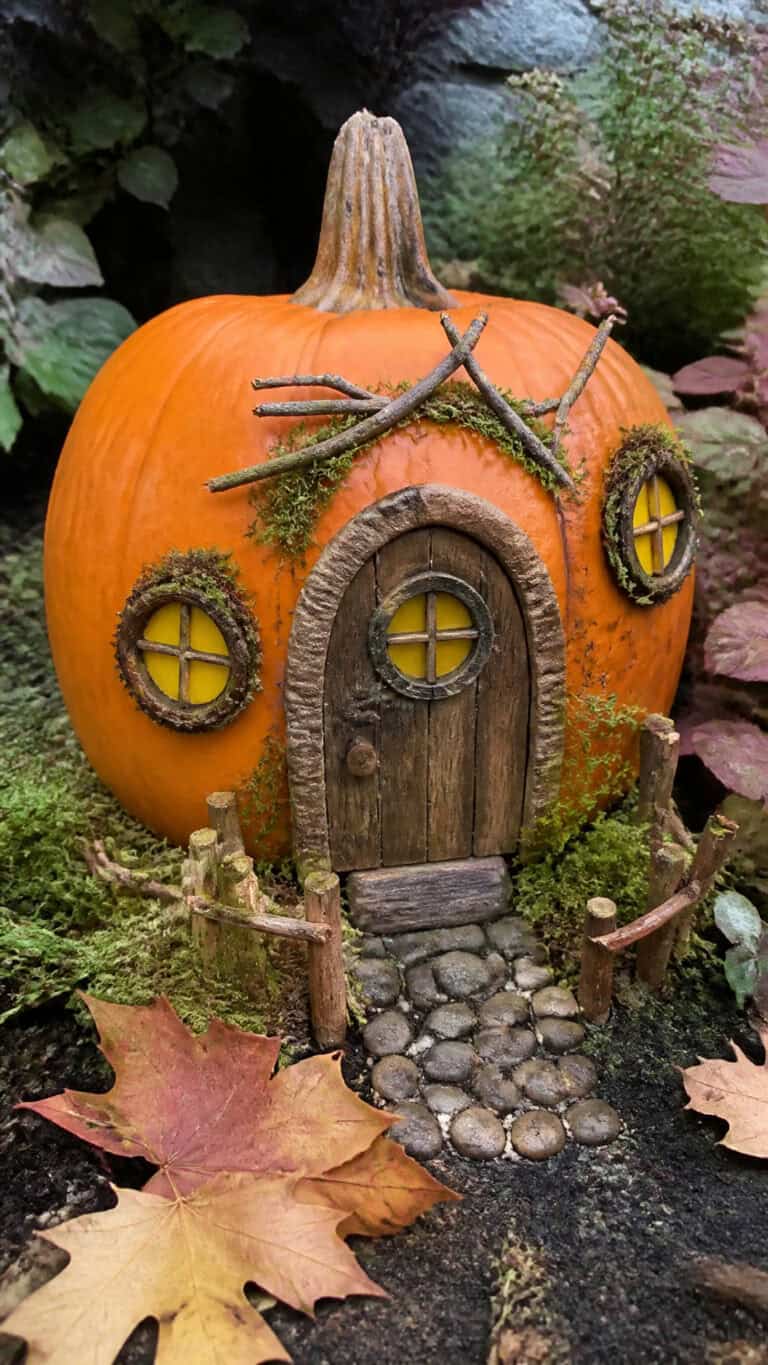
This idea combines the whimsy of fairy gardens with spooky Halloween elements, and it’s perfect for a smaller space or container garden! My youngest is obsessed with fairy gardens, so creating a haunted version was the perfect way to merge his interests with our Halloween decorating. It’s become such a special little corner of our halloween garden!
Start with a large, shallow container or a small dedicated garden bed. Create a miniature spooky scene using small accessories and plants that stay compact. I use miniature sedums, tiny hostas, and small groundcovers as the base planting. Then add miniature Halloween elements: tiny tombstones, small skeleton figurines, mini pumpkins, and a small haunted house or castle structure as the focal point.
The details make this project so special! We’ve added a tiny gravel path leading to the haunted house, a miniature fence made from popsicle sticks painted black, and even tiny ghosts hanging from wire. You can find miniature Halloween accessories at craft stores, or make your own from polymer clay – we’ve spent several rainy afternoons creating tiny bats, witches’ brooms, and potion bottles!
Add some mood lighting with small solar-powered garden lights or battery-operated fairy lights in orange or purple. The boys love checking on the haunted fairy garden at night when it’s all lit up! This is also a great project to do with kids because it’s small enough that they can really take ownership of the design and arrangement. Plus, it’s easy to refresh and change throughout the season as they come up with new ideas!
Glowing Jack-o’-Lantern Planter Display
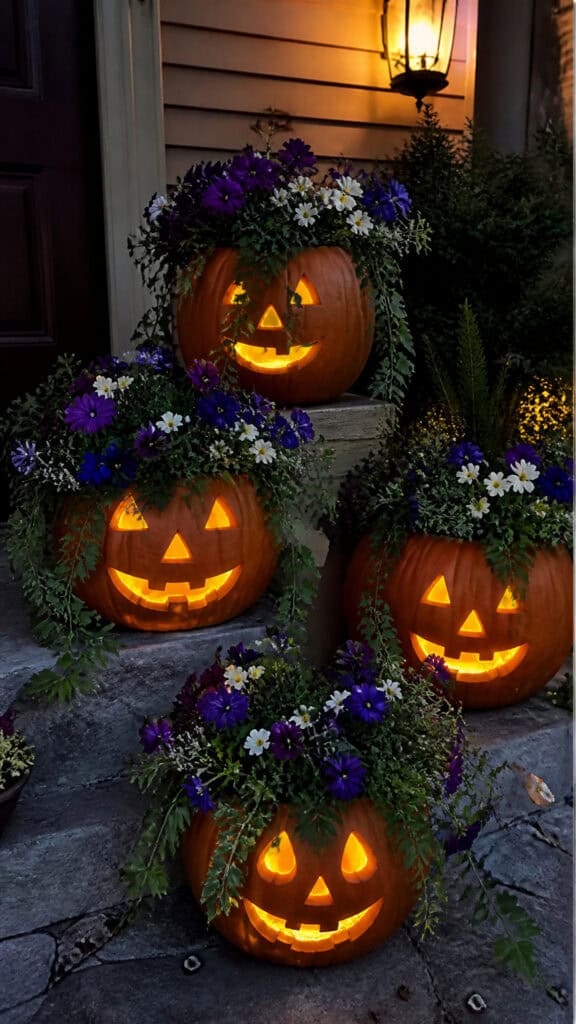
This has become our front porch signature look, and it’s so easy to create! Instead of just carving pumpkins and placing them randomly, I turn them into actual planters filled with beautiful fall flowers. It combines two decorating elements into one stunning display that elevates your halloween garden to the next level!
Choose medium to large pumpkins with flat bottoms so they’ll sit stable. Cut the top off as you would for carving, but make the opening larger than usual. Scoop out all the insides thoroughly – this is the boys’ least favorite part, but someone’s gotta do it! Carve your jack-o’-lantern face on one side, then line the inside with a plastic bag or small plastic pot to protect the pumpkin from moisture.
Fill your jack-o’-lantern planters with fall flowers that complement the orange. I love using deep purple pansies, white alyssum, trailing ivy, and ornamental kale. The plants spill out of the top like crazy hair, which the kids think is hilarious! You can also add trailing plants that cascade down over the carved face for an overgrown, enchanted look.
Arrange multiple jack-o’-lantern planters at varying heights using plant stands, overturned pots, or hay bales. Group them in odd numbers for the most visually appealing display. At night, place battery-operated candles inside before adding the flowers, and they’ll glow from within while showcasing the beautiful plantings on top! These typically last several weeks if you keep the plants watered, making them a fantastic investment for your halloween garden that looks good throughout the entire season!
Spooky Luminaria Path
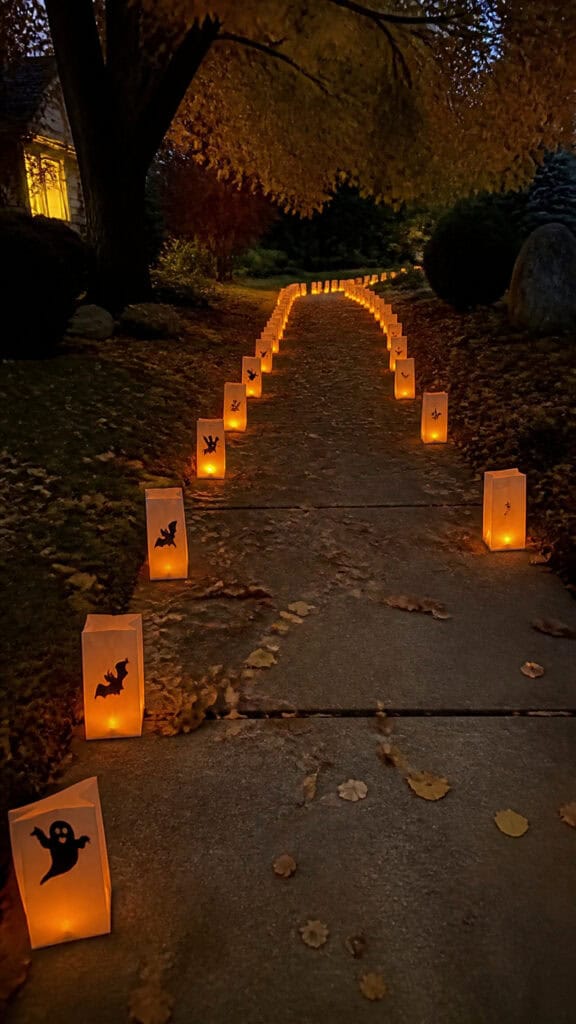
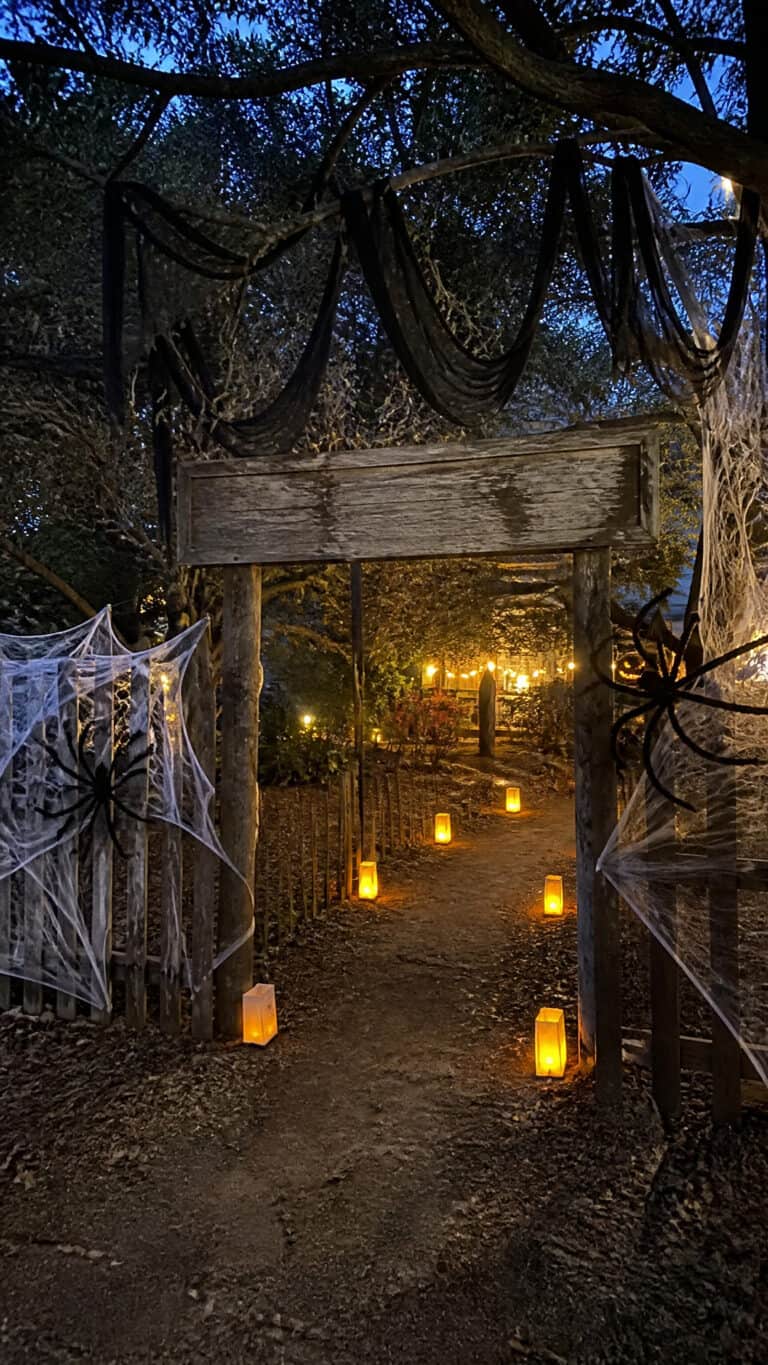
Creating a luminaria-lined path is such a simple way to add atmosphere to your halloween garden, and it’s become one of our favorite Halloween night traditions! There’s something so magical about walking along a path lit by glowing bags, and it creates the perfect ambiance for trick-or-treaters approaching your home!
The classic version uses paper bags, sand, and candles, but I’ve adapted this for durability and safety with three active boys running around! I use white or orange paper bags decorated with Halloween cutouts – bats, ghosts, witches, cats, or jack-o’-lantern faces. Let the kids help with the decorating; we use black construction paper cutouts glued to the bags or cut designs directly into the bags using craft punches.
Instead of sand and real candles, I fill the bottom of each bag with a handful of small rocks or glass gems for weight, then place battery-operated tea lights inside. This means they’re completely safe, won’t blow out in the wind, and can be reused year after year! I’ve even invested in some solar-powered luminaria bags that charge during the day and automatically light up at night – total game-changer for busy moms!
Line both sides of your walkway, driveway, or garden path with the luminarias, spacing them about two to three feet apart. The soft glow creates a welcoming yet spooky atmosphere that guides visitors through your halloween garden. For extra impact, coordinate the colors with your other decorations – all orange for a traditional look, all white for ghostly elegance, or alternate colors for a festive feel. Set them up on Halloween evening, and watch your pathway transform into something truly magical!
Bringing Your Halloween Garden to Life
Creating a festive halloween garden has honestly become one of my favorite parts of the season! These eight ideas can be mixed and matched to suit your space, budget, and personal style. Whether you go all out with every idea or choose just one or two to focus on, the important thing is making it fun and memorable for your family. My boys already start planning next year’s decorations before we’ve even taken down this year’s!
The beauty of outdoor Halloween decorating is that it extends your celebration beyond the four walls of your home and creates joy for everyone who passes by. Our neighbors have told us they actually drive out of their way to see our halloween garden each year, and that makes all the effort worthwhile! So grab some pumpkins, round up the kids, and start transforming your flower beds, planters, and paths into a spooky spectacular display. Trust me, you’ll love it just as much as the trick-or-treaters do!