This post may contain affiliate links. Read the full disclosure here.
There’s something absolutely magical about a circular flower bed that just draws the eye and makes your whole yard feel more intentional and put-together! As a mom of three energetic boys, I’m always looking for landscaping ideas that look amazing but don’t require me to spend every free moment maintaining them. Circular flower beds are perfect because they create such a stunning focal point without being overly complicated to design or care for!
Whether you’re working with a small patch of grass or have a sprawling yard to fill, circular flower bed ideas can transform any space into something truly special. The rounded shape naturally softens hard lines in your landscape and creates a welcoming, organic feel that rectangular beds just can’t match. Plus, they’re surprisingly versatile – you can tuck them into corners, center them in your lawn, or even create multiple circles for a whimsical garden path effect!
Classic Rose Circle with Stone Edging
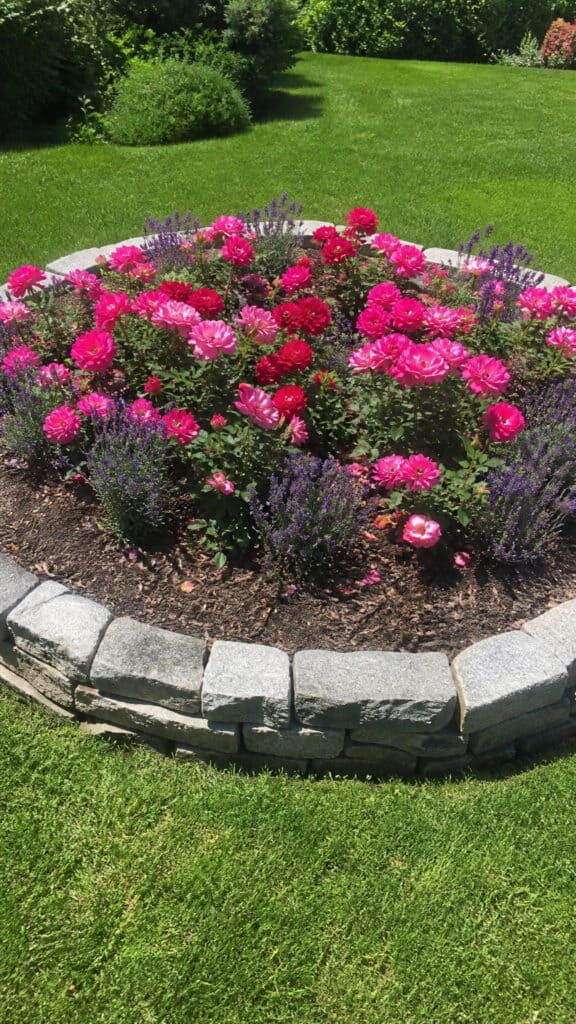

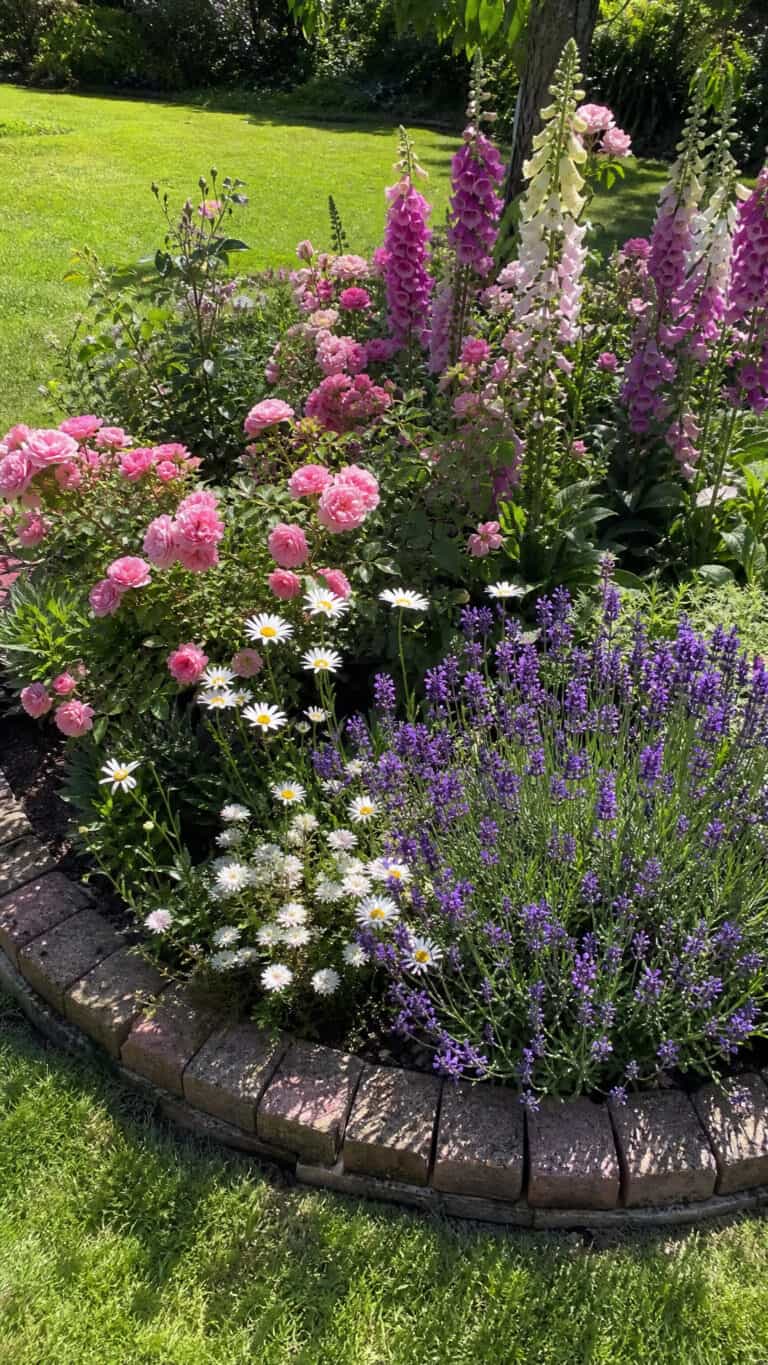
Nothing says timeless elegance quite like a circular rose garden bordered with natural stone! This is one of those circular flower bed ideas that works beautifully in both formal and cottage-style landscapes. I absolutely love how the curves of the stone complement the soft, romantic blooms of roses, creating a focal point that looks professionally designed without the professional price tag!
Start by outlining your circle with stacked stone or river rocks – I find that a diameter of about 6 to 8 feet works perfectly for most yards. Plant your roses in a symmetrical pattern, choosing varieties that bloom at different times throughout the season so you always have color. Hybrid tea roses work wonderfully for the center, while floribundas or shrub roses can fill in around the edges. The key is to leave enough space between plants for air circulation, which helps prevent those pesky fungal diseases that roses can be prone to!
Between the roses, add some low-growing companions like lavender, catmint, or salvia to fill gaps and add contrasting textures. These companion plants also help attract beneficial pollinators, which means more blooms for you! I mulch heavily with shredded bark to keep weeds down – because let’s be honest, with three boys running around, I don’t have time to be out there pulling weeds every day! The stone edging not only looks gorgeous but also keeps mulch contained and creates a clear boundary that even my youngest knows not to run through.
For maintenance, roses do need regular deadheading and an annual pruning, but the payoff is absolutely worth it. This design creates such a sophisticated look that neighbors will think you hired a landscaper! Plus, having fresh roses to cut for the kitchen table is such a lovely bonus that makes me feel like I have my life together, even on those chaotic days!
Rainbow Perennial Ring
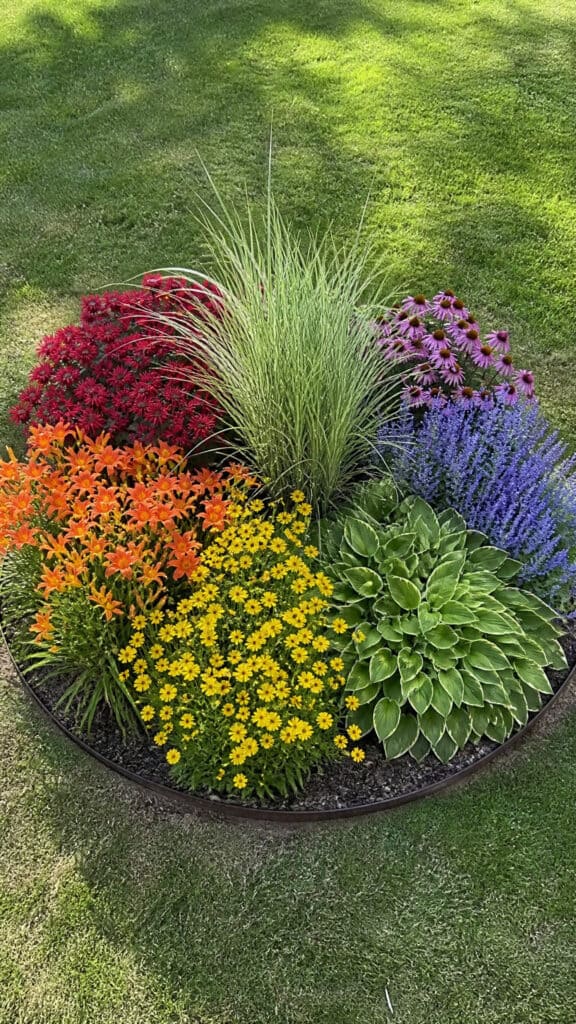
If you want a circular flower bed that delivers non-stop color from spring through fall, a rainbow perennial ring is absolutely the way to go! This is one of my favorite circular flower bed ideas because once it’s established, it practically takes care of itself – and we all know how valuable low-maintenance landscaping is when you’re chasing after kids all day!
The concept is simple but stunning: arrange perennials in color-coordinated sections around your circle, creating a rainbow effect that changes and evolves throughout the growing season. Start with a center plant that has height and drama – I love using ornamental grasses like ‘Karl Foerster’ or a tall sedum for this purpose. Then, working outward in wedges like slices of a pie, plant different colored perennials in each section.
For a true rainbow effect, try this arrangement: red section with bee balm or salvia, orange section with daylilies or butterfly weed, yellow section with coreopsis or black-eyed Susans, green section with hostas or ferns for foliage interest, blue section with Russian sage or veronica, and purple section with coneflowers or asters. You can adjust based on what grows well in your zone, of course! The beauty of this design is that different plants bloom at different times, so your rainbow is constantly shifting and surprising you with new combinations.
Edge your rainbow ring with a simple material like metal landscape edging or brick laid on its side – you want the focus to be on those gorgeous colors, not a competing border. I recommend spacing plants closer than the tag suggests because a fuller look develops faster, and gaps between plants just invite weeds to move in. Mulch between plants initially, but as they mature and fill in, you’ll have very little bare soil showing!
This design has been such a conversation starter in my neighborhood! People literally slow down when they drive by, and I’ve had so many neighbors stop to ask about it. The best part? Once established, these perennials come back year after year, getting bigger and more impressive with age. It’s like having a gift that keeps on giving, and I’m all about that kind of gardening magic!
Tiered Circular Garden with Stacked Heights
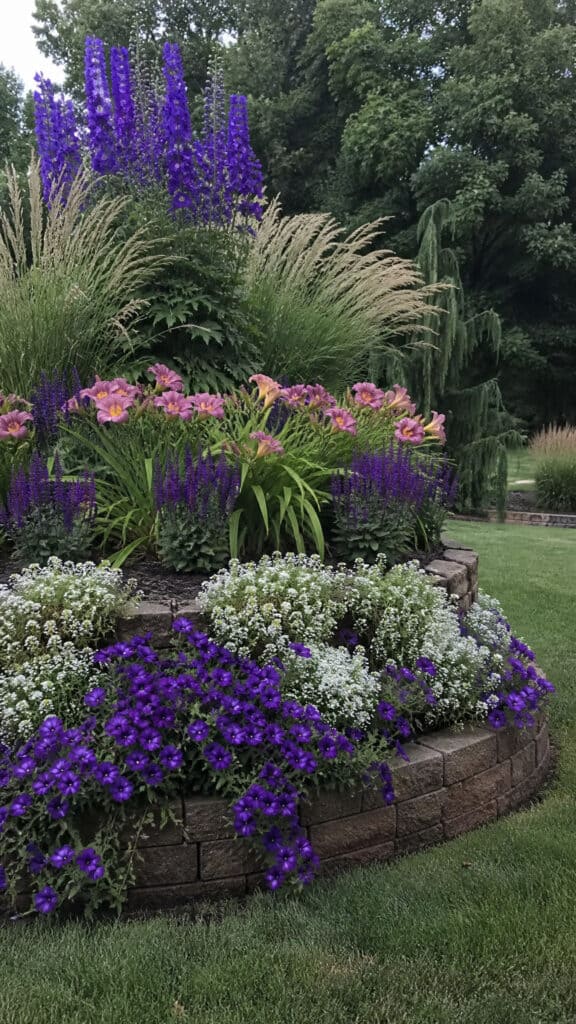
Creating dimension in your flower bed is one of those design tricks that makes everything look so much more professional and intentional! A tiered circular garden is one of those circular flower bed ideas that really maximizes visual impact by playing with different heights. It’s like creating a living sculpture right in your yard, and honestly, it’s easier to achieve than you might think!
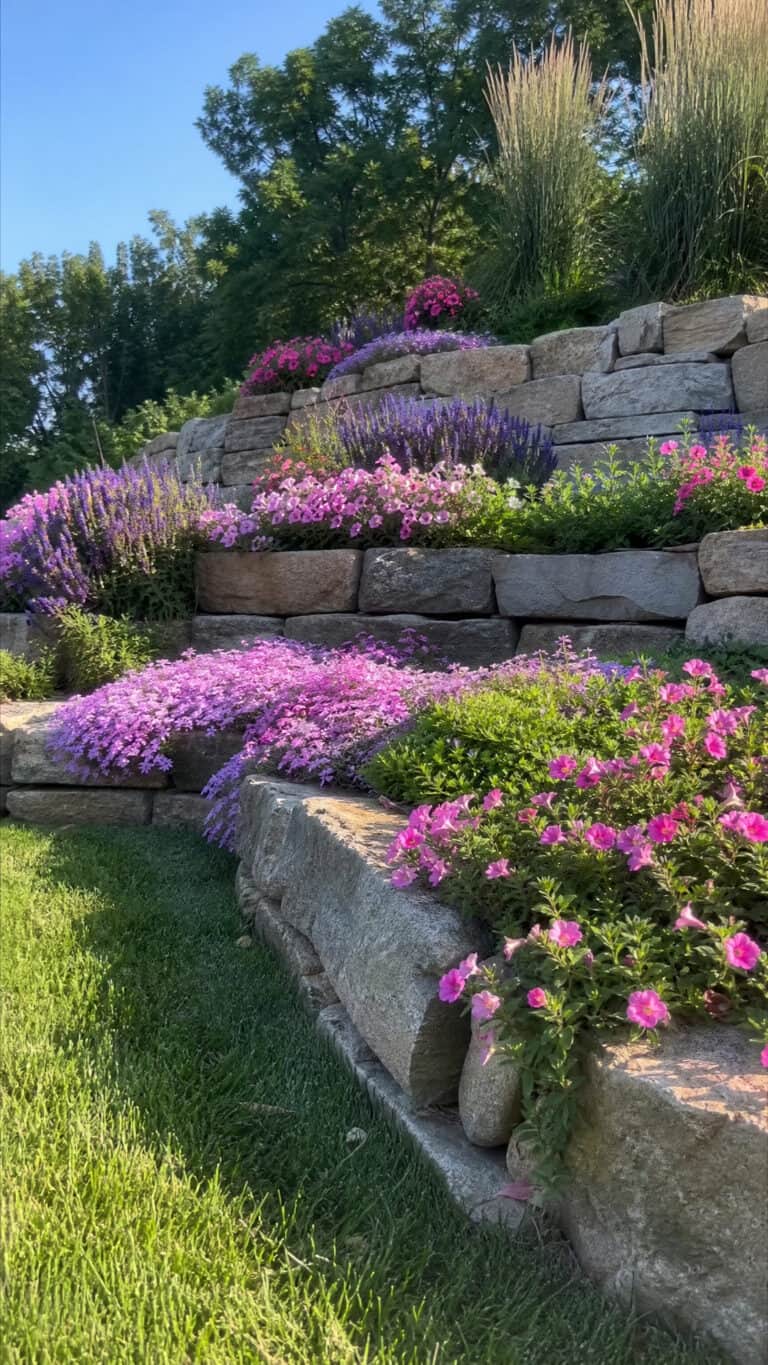
The basic principle is to plant in tiers, with the tallest plants in the center and gradually shorter plants as you move outward. This ensures that every plant is visible and nothing gets hidden behind taller neighbors. For the center, go bold with something dramatic like tall ornamental grasses, delphiniums, or even a dwarf ornamental tree if you want a really substantial focal point. The middle tier should feature medium-height plants like daylilies, salvia, or Russian sage – basically anything that grows 18 to 30 inches tall.
The outer ring is where you bring in the low-growing stars of the show: creeping phlox, sedum, alyssum, or even annual petunias for season-long color. These edge plants should spill slightly over your border, softening the transition between the flower bed and the lawn. This cascading effect is what really makes the tiered design sing! I like to repeat colors throughout the different tiers to create cohesion – for example, purple salvia in the middle tier and purple petunias in the outer ring creates a beautiful color echo.
One thing I’ve learned the hard way (because of course I had to learn it the hard way!) is to really pay attention to those mature size tags on plants. What looks perfectly tiered the first year can become a jumbled mess by year three if you don’t plan for growth. Leave adequate space between plants, even though it looks sparse initially. Trust the process! You can always fill gaps with annuals while waiting for perennials to mature.
This design works beautifully at any scale, too! I’ve seen stunning tiered circular beds that are just 4 feet across, and I’ve seen massive ones that are 12 feet or more. The principles stay the same regardless of size. And here’s a mom tip: this design is actually pretty forgiving when it comes to soccer balls landing in it – the varied heights mean there’s usually somewhere for the ball to land without crushing everything! Not that I’m speaking from experience or anything!
Butterfly and Pollinator Paradise Circle
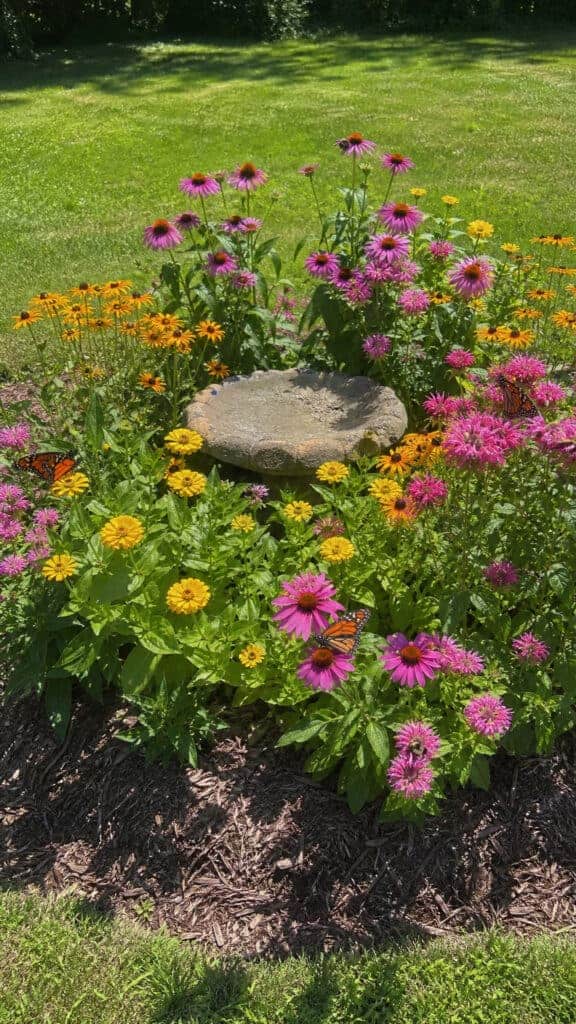
Creating a circular flower bed specifically designed to attract butterflies, bees, and hummingbirds is not only gorgeous but also incredibly rewarding! This is one of those circular flower bed ideas that serves a bigger purpose while still looking absolutely stunning. My boys love watching the butterflies and hummingbirds that visit our pollinator circle – it’s turned into an unexpected nature education opportunity right in our backyard!
The key to a successful pollinator garden is choosing plants that provide nectar and pollen throughout the entire growing season. Start with native plants whenever possible, as these are what local pollinators have evolved to feed on and they’re typically easier to grow in your area. For a circular design, I like to group plants in odd numbers (threes or fives) rather than planting in rows, which creates a more natural, meadow-like appearance that pollinators absolutely love!
Some of my absolute must-have plants for a pollinator circle include purple coneflowers (butterflies go crazy for these!), black-eyed Susans, bee balm, milkweed (essential for monarch butterflies), asters, and zinnias. Add in some herbs like lavender, oregano, and thyme – not only do pollinators adore them, but you can snip some for cooking! For height variation, include some taller plants like Joe Pye weed or tall verbena in the center, and let shorter bloomers fill in around the edges.
One important thing to remember: avoid using pesticides in your pollinator garden! Even organic options can harm beneficial insects. I’ve found that once you have a healthy population of good bugs, they actually help keep the bad bugs in check naturally. It’s like having a tiny ecosystem working for you! Also, leave some areas of bare soil exposed – many native bees are ground-nesters and need access to soil to create their homes.
Consider adding a shallow birdbath or small water feature in or near your pollinator circle. Butterflies and bees need water too, and providing it makes your garden even more attractive to them. I put a few flat stones in our birdbath so smaller insects have a safe place to land and drink without drowning. Watching a butterfly sip water on a hot summer day while my boys play nearby is honestly one of those perfect mom moments that makes all the gardening effort worthwhile!
Moonlight Garden Circle with White Blooms
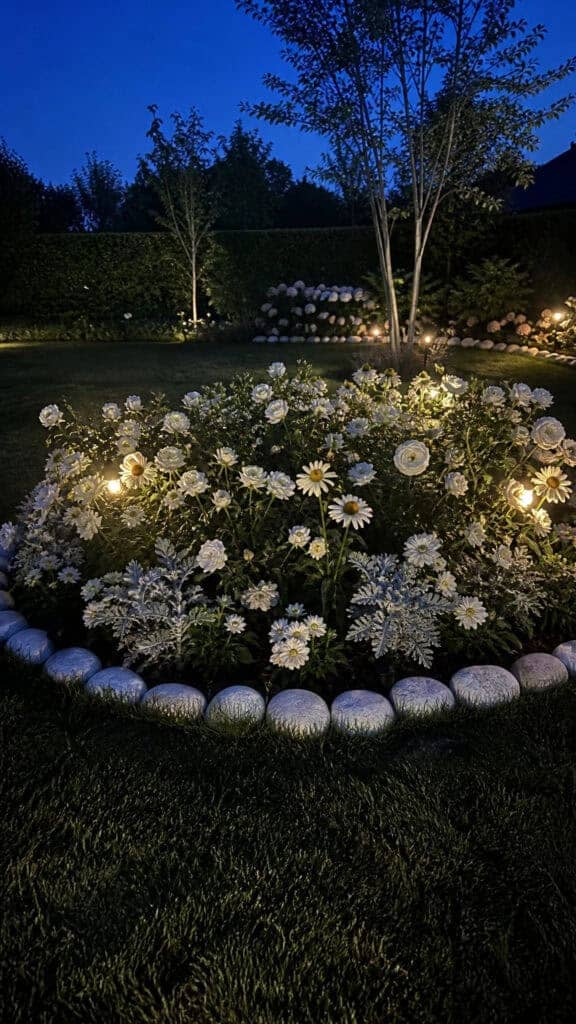
There’s something absolutely enchanting about a garden designed specifically to glow in the evening light! A moonlight garden circle is one of those circular flower bed ideas that transforms your yard into something magical after the sun goes down. As someone who often doesn’t get to enjoy the garden until after the boys are in bed, I especially appreciate a design that looks its best in the evening hours!
The concept centers around using white and light-colored flowers that seem to glow in twilight and moonlight, along with plants that have silvery or variegated foliage that catches and reflects even the faintest light. White flowers also tend to be more fragrant in the evening, releasing their scent to attract night-pollinating moths – it’s like aromatherapy right in your backyard! Position your moonlight garden circle where you can see it from a patio, deck, or window so you can enjoy it during those peaceful evening moments.
For stunning white blooms, consider planting white roses, shasta daisies, white coneflowers, white peonies, and white lilies. Add in some night-blooming flowers like moonflower vine (train it up a small obelisk in the center for dramatic height!), evening primrose, or night-blooming jasmine. For foliage interest, incorporate plants with silver or white-variegated leaves like dusty miller, artemisia, lamb’s ear, or variegated hostas. These foliage plants provide interest even when flowers aren’t blooming.
Edge your moonlight garden with white-painted stones or light-colored pavers to enhance the glowing effect. You could even add small solar lights tucked among the plants for extra illumination – I have a few scattered throughout mine, and they create such a dreamy atmosphere! The key is to keep the lighting subtle and low to the ground so it enhances rather than overwhelms the natural beauty of the white blooms.
I’ve found that this garden design is particularly special during summer evenings when we’re outside roasting marshmallows or just enjoying the cooler temperatures. There’s something so peaceful about sitting outside with a cup of tea after bedtime, watching the white flowers seem to glow brighter as the sky darkens. It’s become my favorite spot to decompress after those long, chaotic days that come with raising three boys! Plus, it photographs beautifully for those Instagram-worthy garden shots – just saying!
Cottage Garden Circle Overflowing with Charm
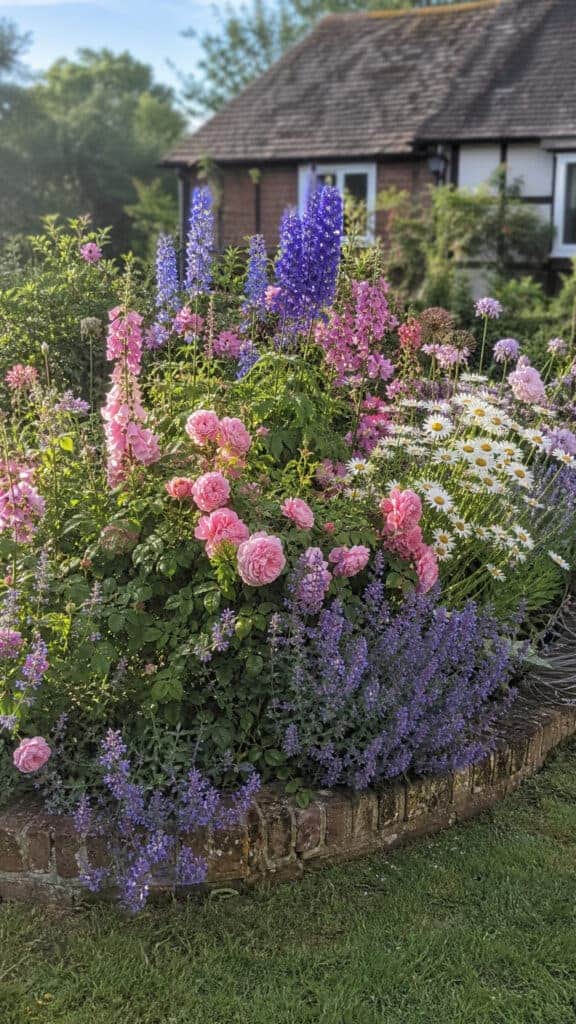
If you love that romantic, slightly wild, overflowing garden look, then a cottage garden circle is definitely one of the circular flower bed ideas you need to try! This style is all about abundance, mixing colors and textures freely, and creating that ‘I’ve been here for a hundred years’ vibe even if you just planted it last spring. The best part? This style is incredibly forgiving – there’s no such thing as too much or too messy in a cottage garden!
The cottage garden aesthetic combines perennials, annuals, herbs, and even vegetables all jumbled together in a glorious riot of color and texture. For your circular bed, start by choosing a color palette – traditional cottage gardens often feature pinks, purples, blues, and whites, but you can absolutely go with warmer tones if that suits your style better. The key is to plant densely and let things mingle and overlap naturally.
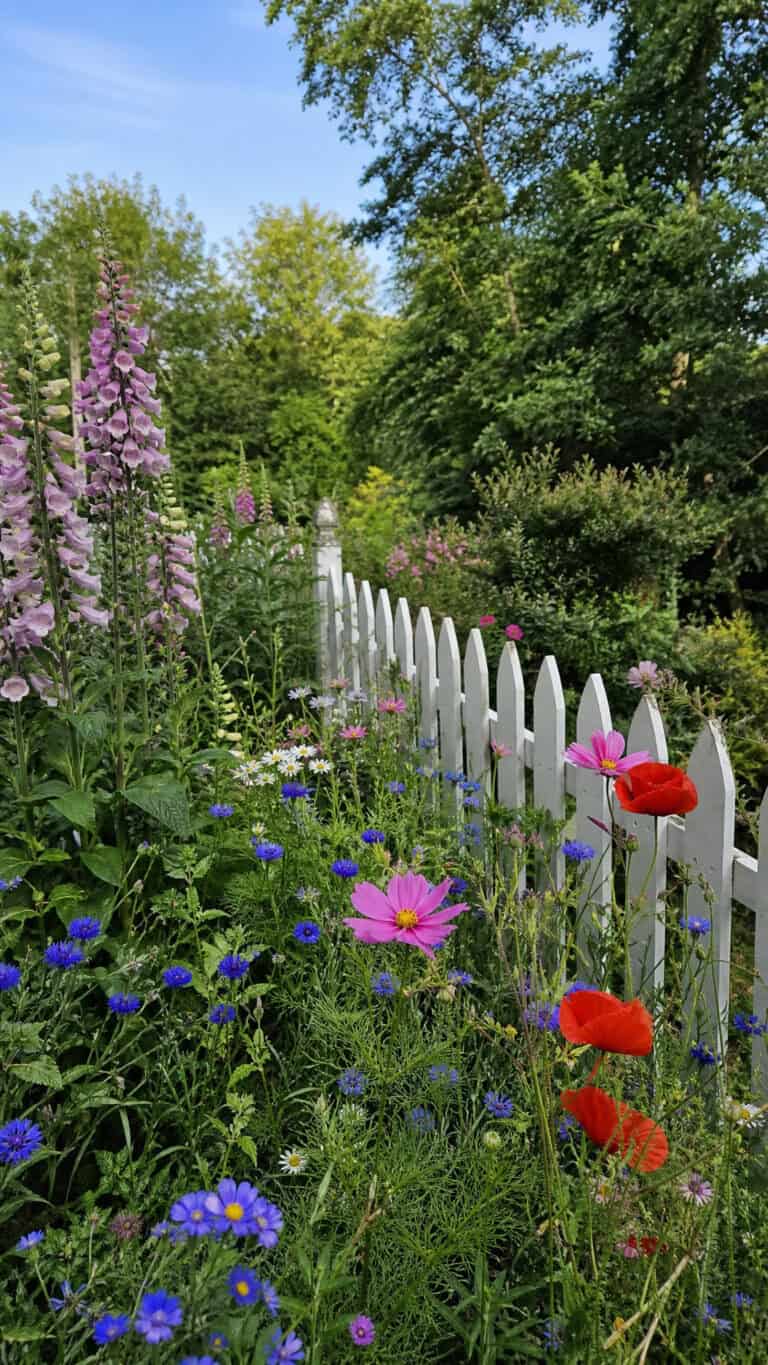
Some classic cottage garden plants that work beautifully in a circular design include foxgloves, hollyhocks, delphiniums, roses (especially old-fashioned varieties or David Austin roses), lavender, catmint, peonies, and yarrow. Mix in some self-seeding annuals like cosmos, sweet alyssum, and bachelor buttons – these will pop up in unexpected places and add to that charming, unplanned look. Don’t forget herbs like rosemary, sage, and thyme, which add wonderful texture and fragrance!
For edging, a cottage garden circle looks perfect with something rustic and informal – think weathered brick, stacked stone, or even a low picket fence. You could also use traditional English edging plants like boxwood or lavender to define the circle’s edge. I personally love using catmint as a living edge because it spills over beautifully and blooms for months with just a quick trim mid-season!
The maintenance on a cottage garden circle is actually less than you might think! Yes, it looks full and lush, but that density means fewer weeds can establish themselves. I do a big cleanup in early spring and another in fall, with occasional deadheading throughout the season. The self-seeding annuals do their own thing, filling in gaps and creating happy surprises. This style of gardening feels very forgiving to me – if something doesn’t work, something else fills in. If I forget to deadhead, it’s not the end of the world. It’s perfect for busy moms who want beauty without perfection!
Seasonal Color Wheel Circle
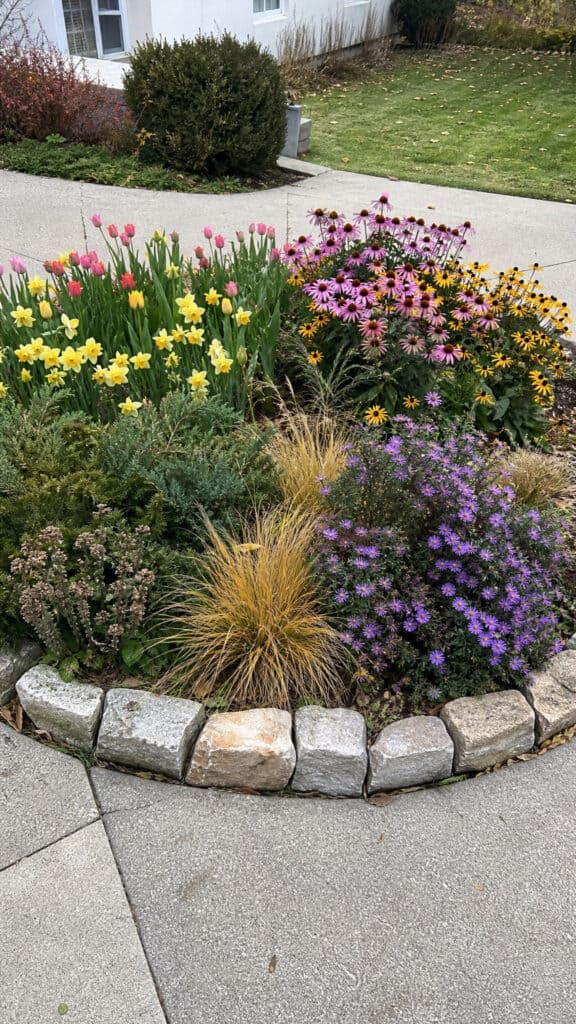
One of the smartest circular flower bed ideas I’ve implemented is designing a seasonal color wheel that provides interest all year long! This approach ensures that no matter what time of year it is, your circular bed has something beautiful happening. As someone who looks out at the yard every single day (usually while washing dishes – such is mom life!), having year-round interest makes such a difference in how I feel about our outdoor space!
The concept is to divide your circle into four sections, with each section featuring plants that peak in a different season. Think of it like slicing a pie into quarters, with each quarter dedicated to spring, summer, fall, or winter interest. This way, throughout the year, there’s always at least one section that’s putting on a show, and you’ll often have multiple sections looking great at once during transition periods!
For your spring section, include early bloomers like crocuses, daffodils, tulips, and hellebores. The summer section should feature heat-lovers like daylilies, coneflowers, black-eyed Susans, and maybe some annuals like zinnias or marigolds for continuous color. The fall section is where you bring in asters, sedum ‘Autumn Joy’, ornamental grasses that turn golden, and mums for that classic autumn look. For winter interest, include evergreen plants, ornamental grasses that hold their structure, winterberry holly, or plants with interesting bark or seed heads that look beautiful covered in frost or snow.
Edge your seasonal circle with something that looks good year-round, like stone or brick. You might also consider adding a few small evergreen shrubs or boxwood balls at the cardinal points (north, south, east, west) to provide structure and greenery even in winter. These evergreen anchors help the bed look intentional even when some sections are dormant!
I’ve found that photographing my seasonal circle throughout the year has become a fun way to document the changes and plan for improvements. Each season, I make notes about what worked well and what gaps I need to fill. Maybe the summer section needs more color in July, or the winter section could use another evergreen for better structure. It’s an ongoing project, but that’s part of what makes gardening so satisfying! Plus, the boys love seeing the changes – it’s become a natural way to teach them about seasons and plant life cycles without it feeling like a lesson!
Modern Minimalist Circle with Ornamental Grasses
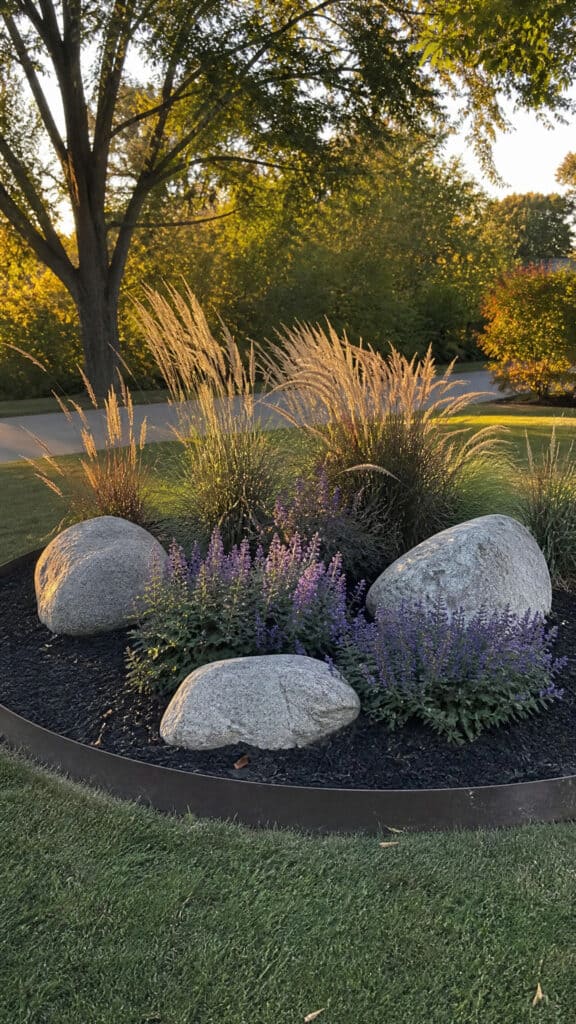
Not every circular flower bed needs to be packed with color to make an impact! A modern minimalist circle featuring ornamental grasses and a restrained plant palette is one of those circular flower bed ideas that proves sometimes less really is more. This style is perfect if you love clean lines, contemporary design, or just want something that looks sophisticated without requiring tons of maintenance – and believe me, I’m all about that low-maintenance life!
The key to nailing the minimalist look is repetition and restraint. Choose just two or three types of plants and use them in multiples rather than having one of everything. Ornamental grasses are absolutely perfect for this style because they provide movement, texture, and year-round interest without being fussy. Some of my favorites include ‘Karl Foerster’ feather reed grass, fountain grass, maiden grass, and blue fescue. These grasses work beautifully as the foundation of your design!
Complement your grasses with just one or two other plant types – maybe a mass planting of a single color of daylilies, or a drift of purple salvia, or even just one type of sedum. The idea is to create bold blocks of the same plant rather than a mixed tapestry. This repetition creates a sense of calm and intentionality that’s very modern and zen. You could also incorporate decorative elements like large smooth boulders, a piece of driftwood, or modern metal sculptures as focal points!
For edging, keep it sleek and simple – steel landscape edging, smooth concrete pavers, or even a clean-cut edge with no physical border at all. Mulch with a uniform material like black mulch, pea gravel, or river rock rather than shredded bark. The goal is a polished, intentional look where every element has a purpose. I use black mulch in mine, and it really makes the green and gold tones of the grasses pop!
The maintenance on a minimalist grass circle is wonderfully simple! Most ornamental grasses just need one big cut-back in early spring before new growth emerges, and that’s pretty much it. No deadheading, no dividing every year, no constant fussing. They look beautiful in all seasons – green and flowing in summer, golden and architectural in fall, and even interesting in winter when frost highlights their seed heads. For a busy mom, this is pretty much the dream garden: maximum impact with minimal time investment. I can spend my gardening time actually enjoying the space rather than constantly maintaining it!
Creating Your Perfect Circular Focal Point
The beauty of circular flower bed ideas is that there’s truly a style for everyone, whether you love romantic cottage gardens, modern minimalism, or anything in between! The circular shape naturally draws the eye and creates a sense of completion and harmony in your landscape that’s hard to achieve with other bed shapes. Plus, working with a circle is actually easier than you might think – grab a stake, tie a string to it, and use the string as a compass to mark your perfect circle. Easy peasy!
As you plan your circular flower bed, remember that gardens are never truly finished – they’re always evolving and growing, just like our families! Start with a design that speaks to you, choose plants appropriate for your climate and sun exposure, and don’t be afraid to make changes as you learn what works best in your specific space. Whether you’re creating a pollinator paradise, a moonlight garden, or a low-maintenance grass circle, you’re adding beauty and value to your home while creating a space that brings you joy. And in the midst of the chaos of raising kids, having that little spot of beauty to tend and enjoy is absolutely priceless!